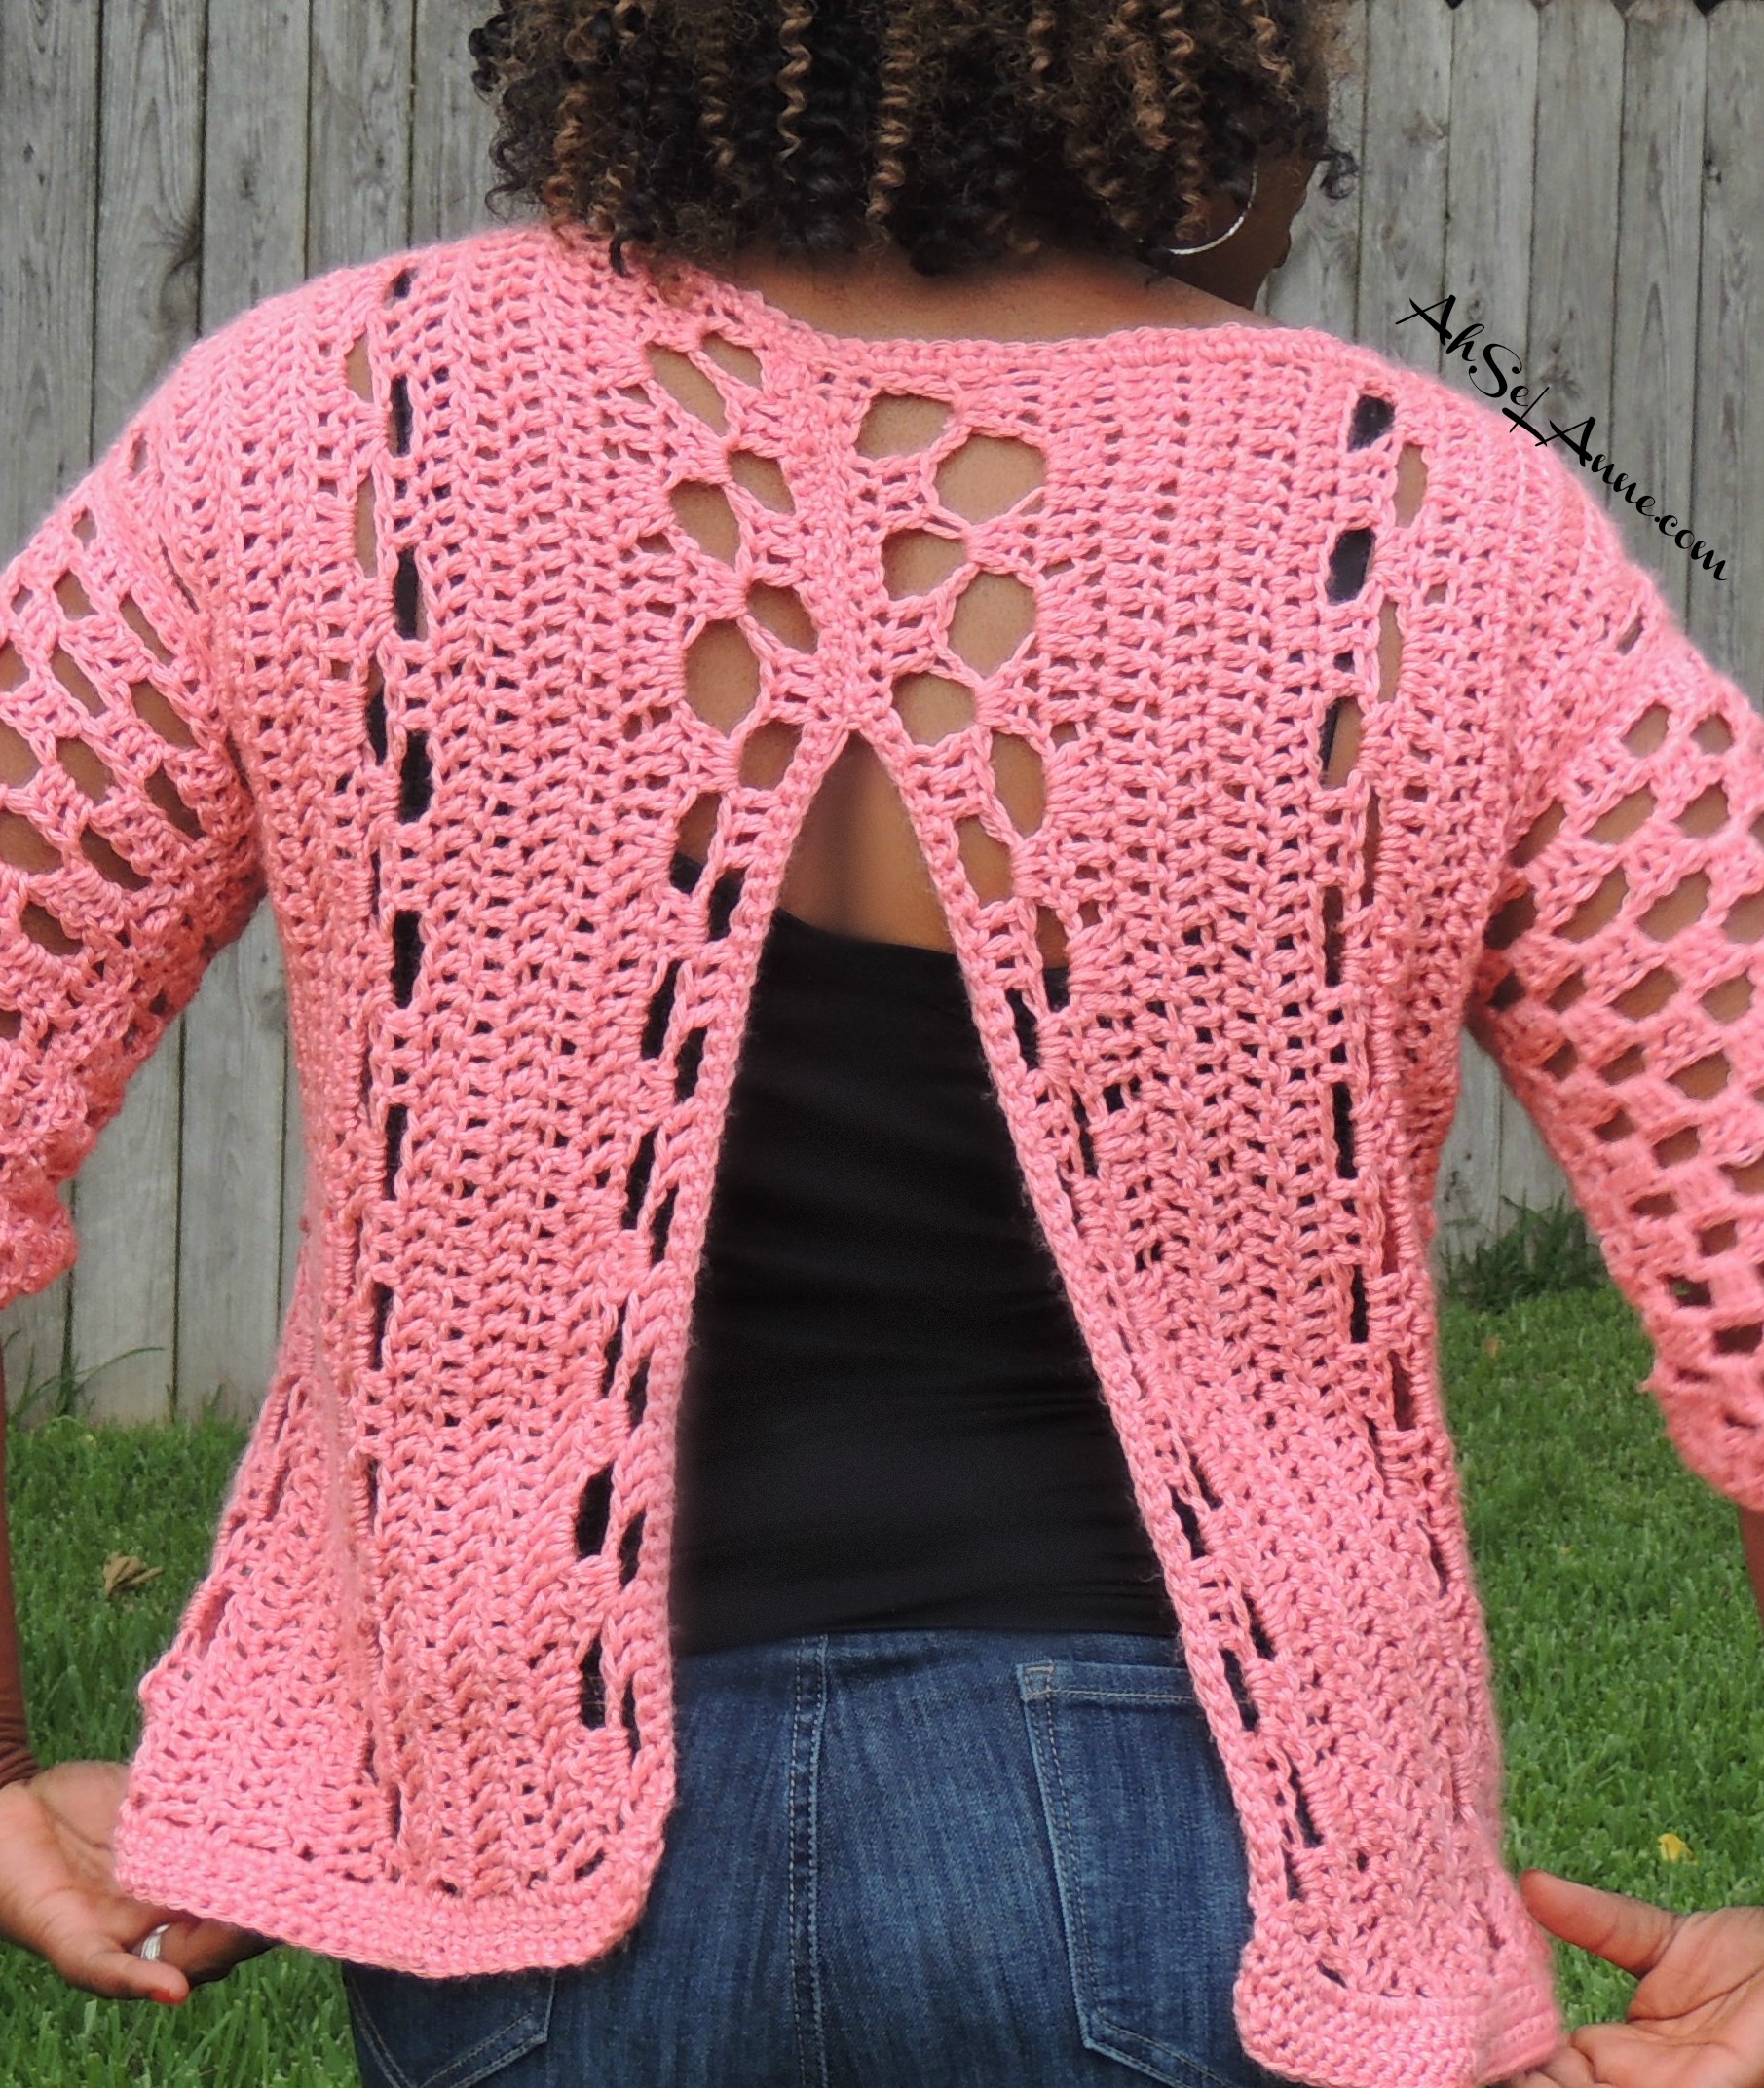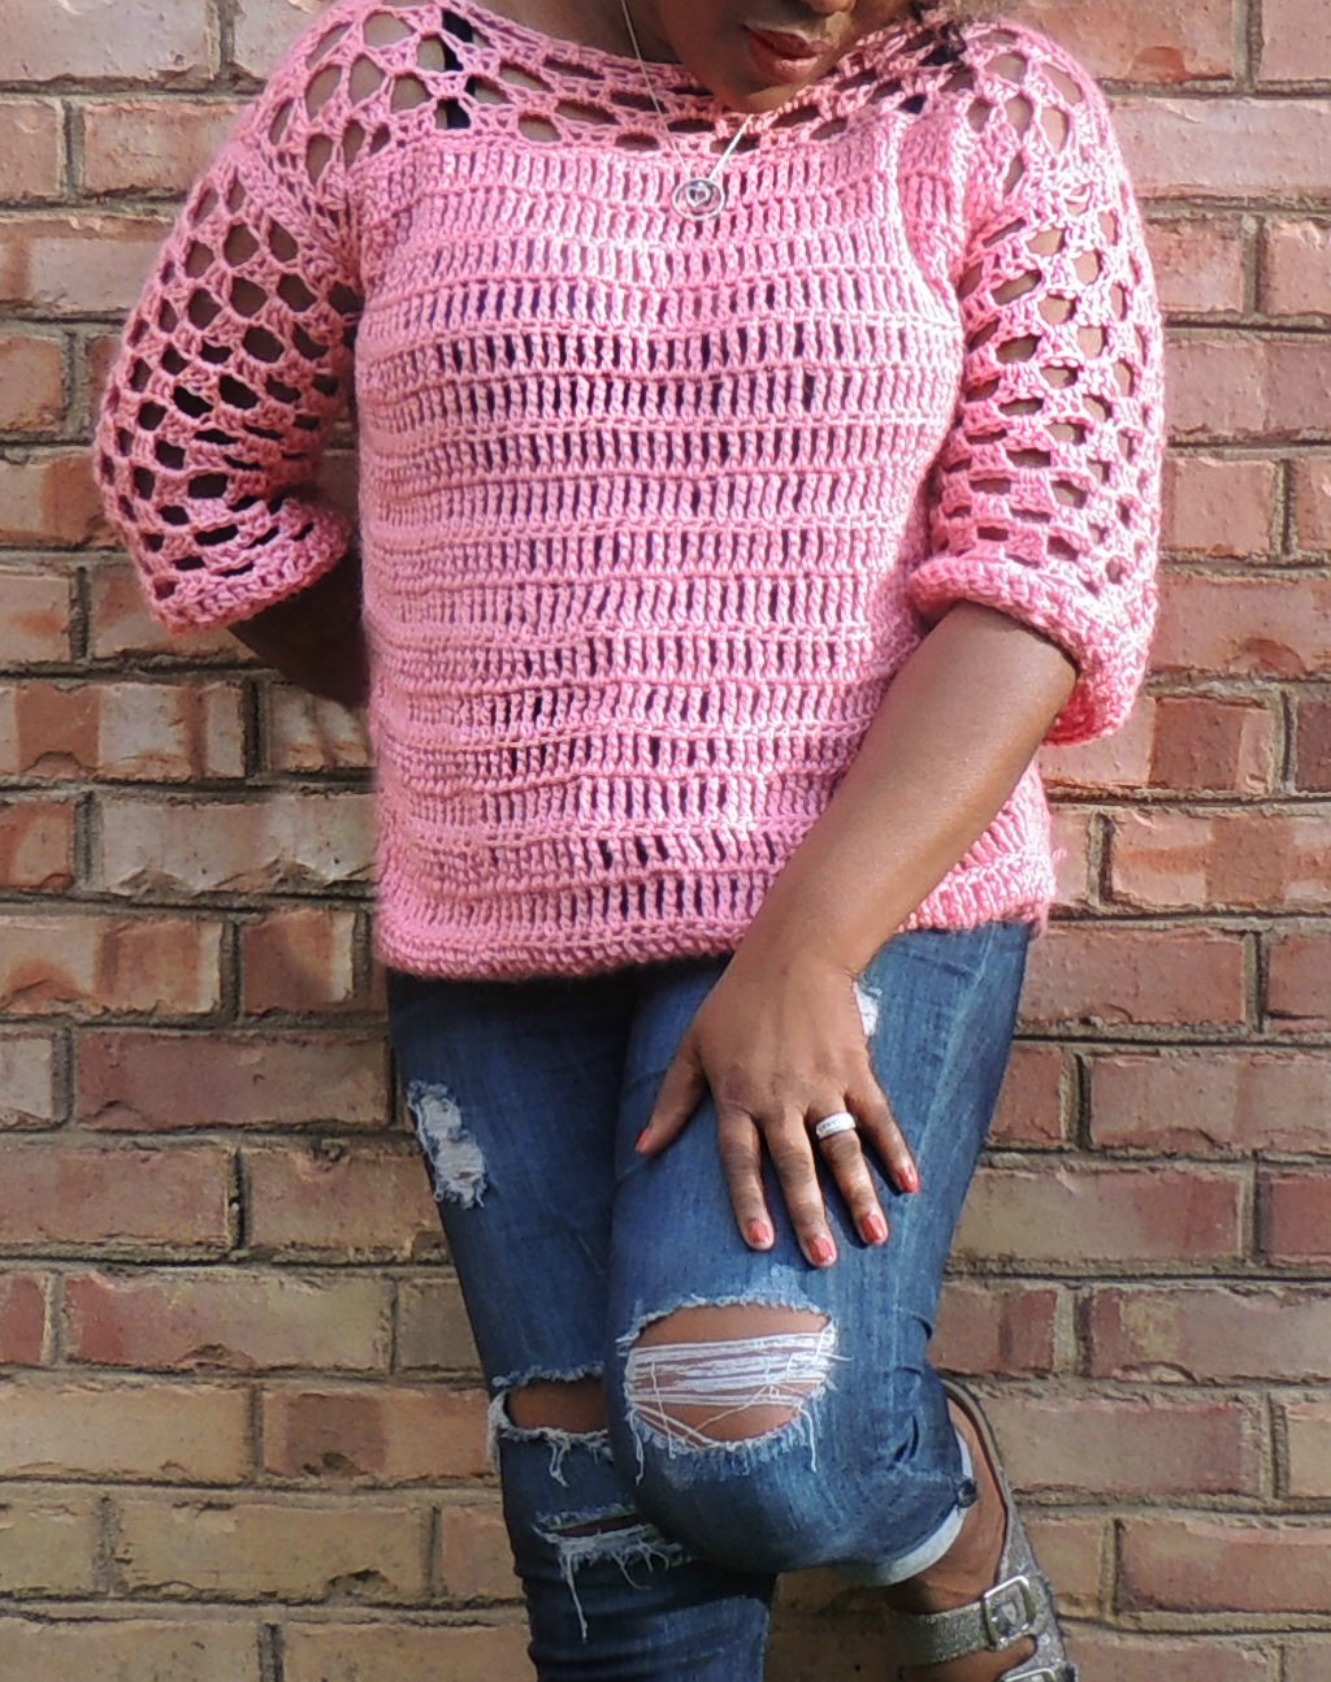


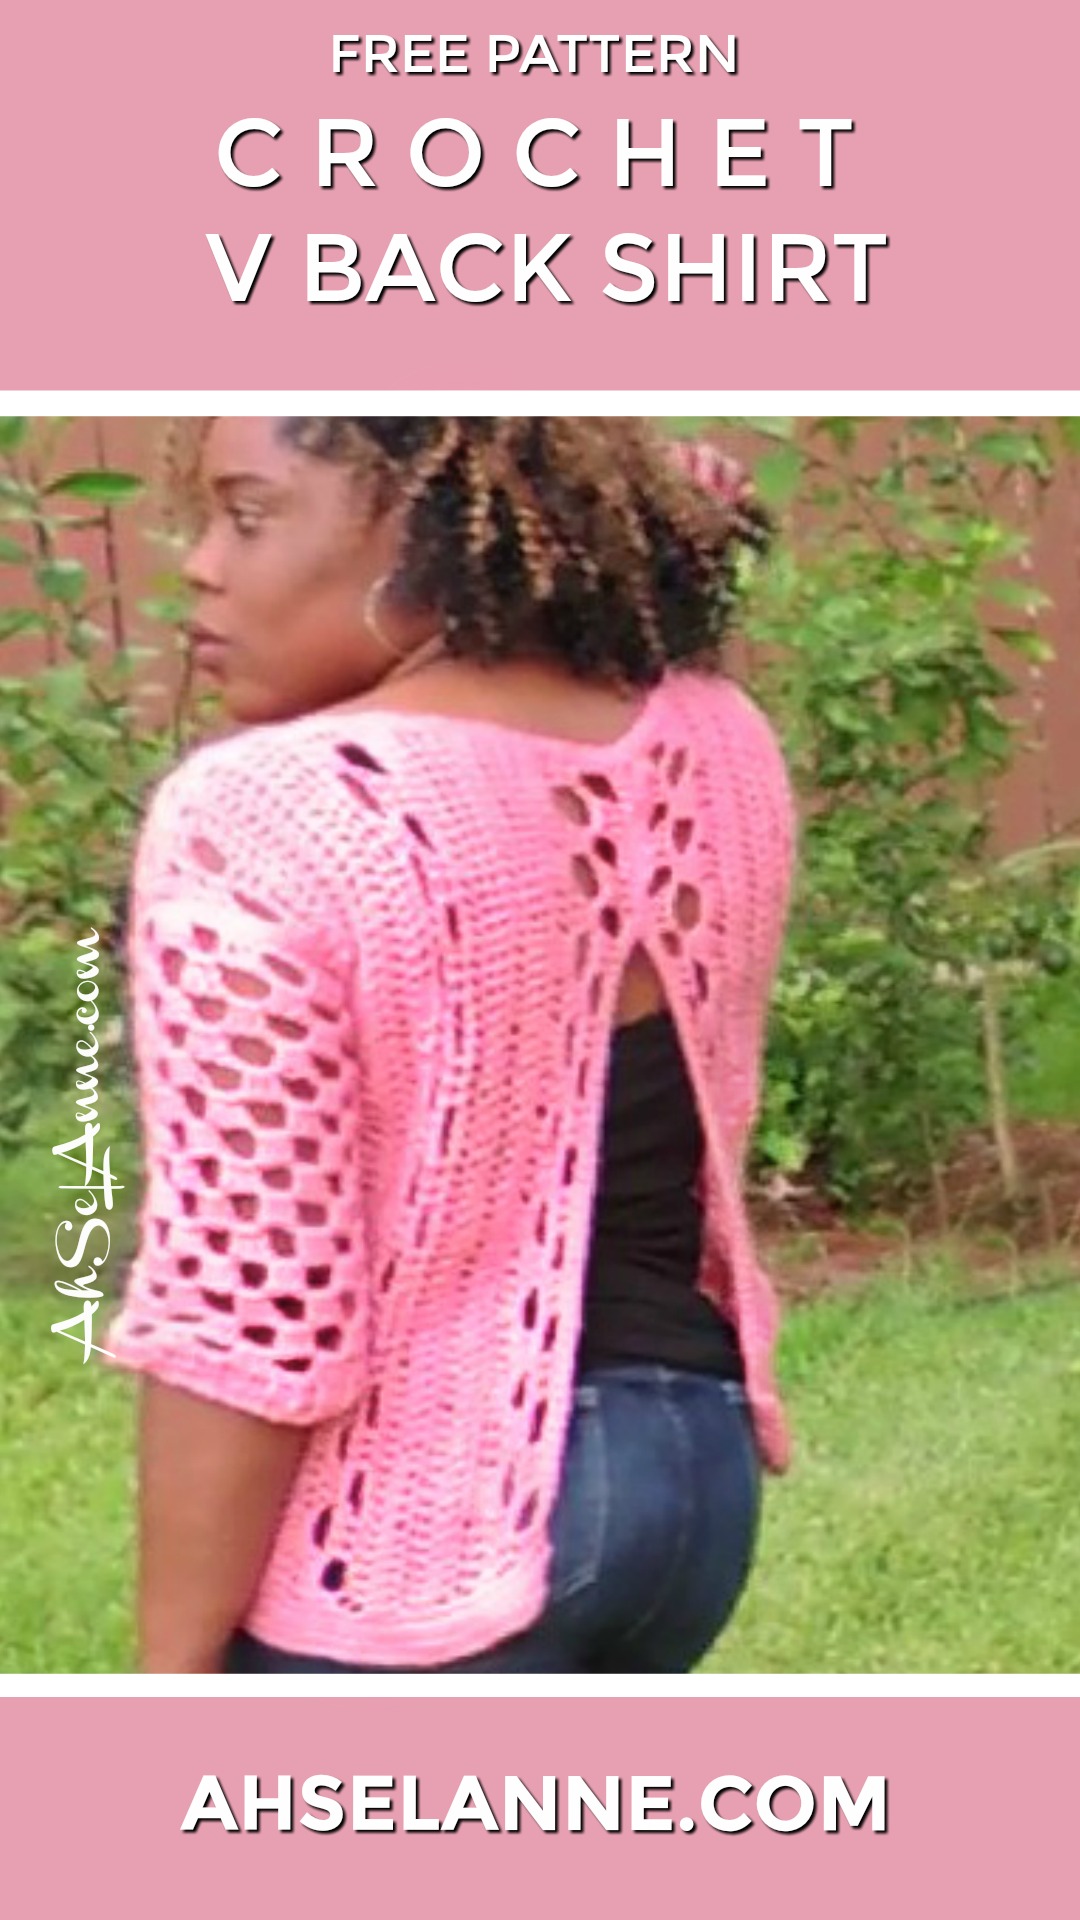
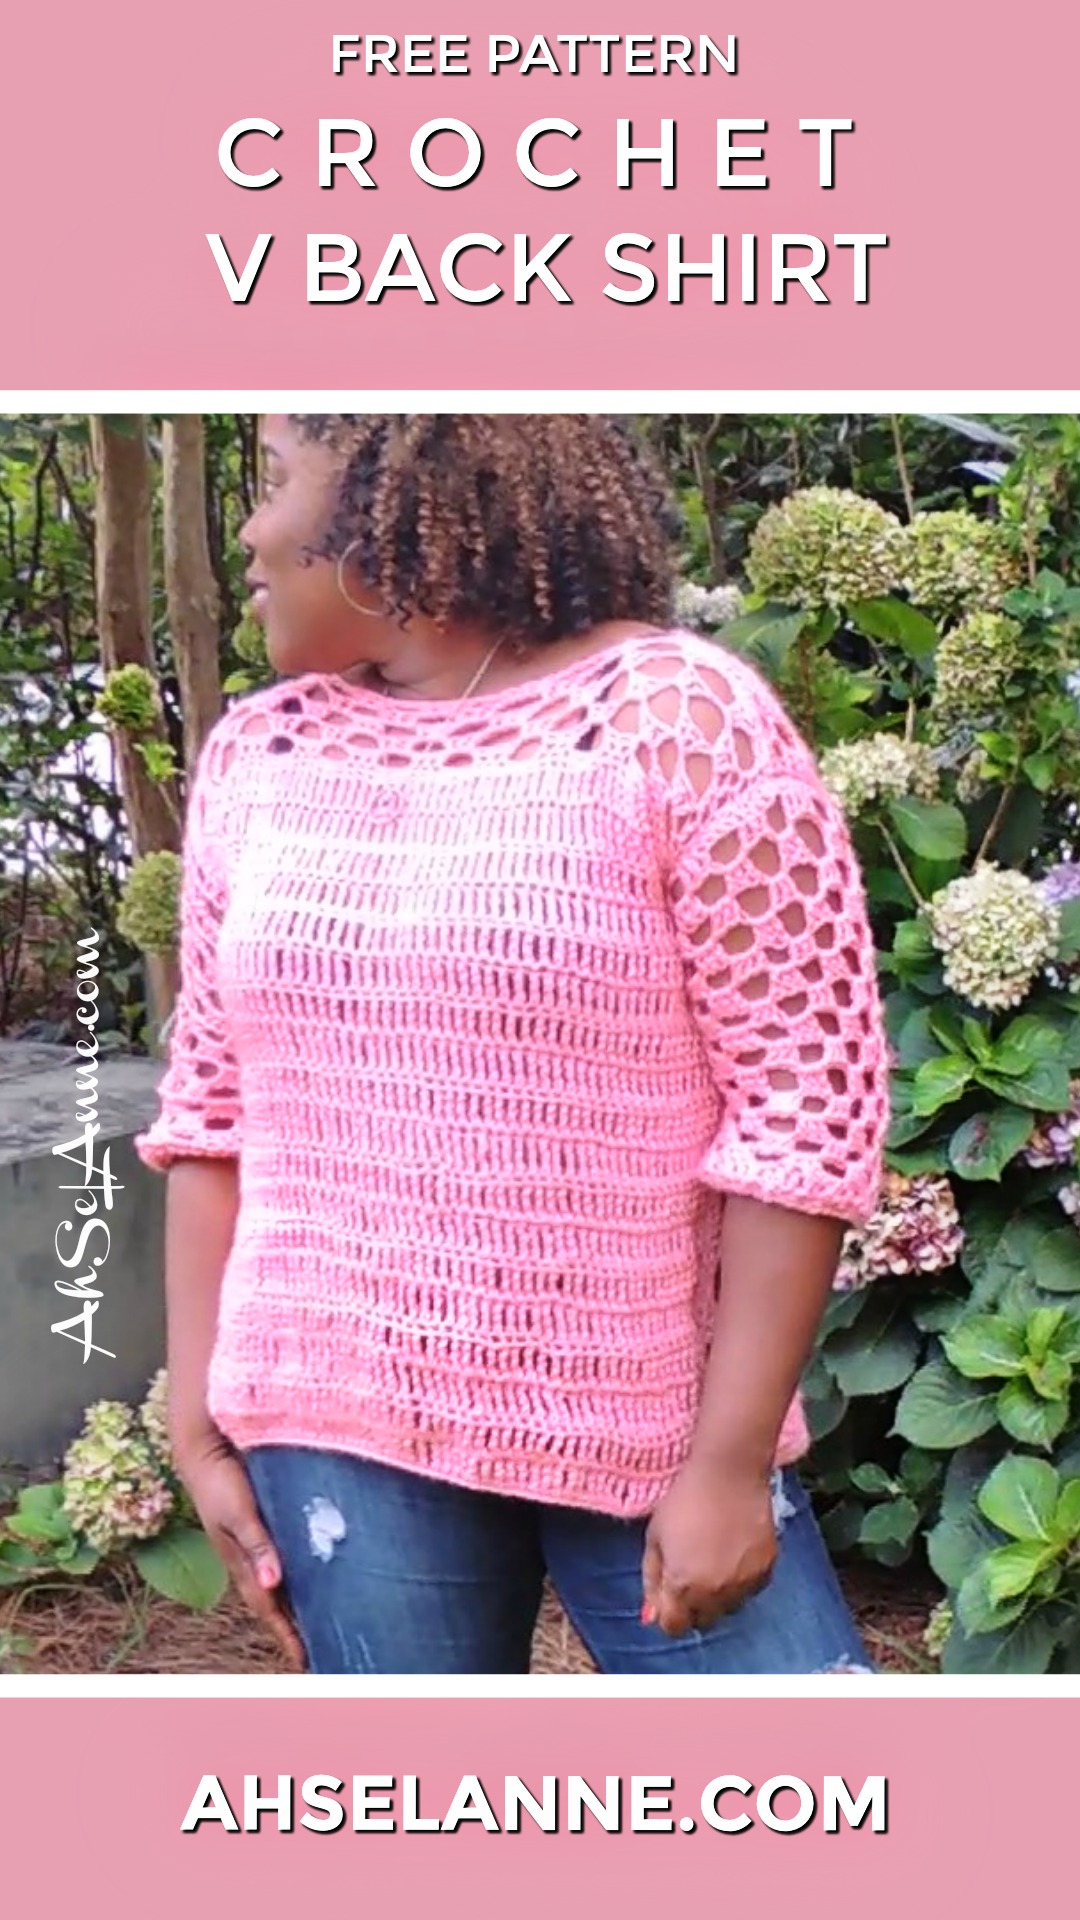
Crochet Sweater with a V-back opening is a fun crochet project that can be created with varying colors and sizes. This tutorial/pattern will allow you to create a split-back crochet shirt, using a few different crochet stitches.
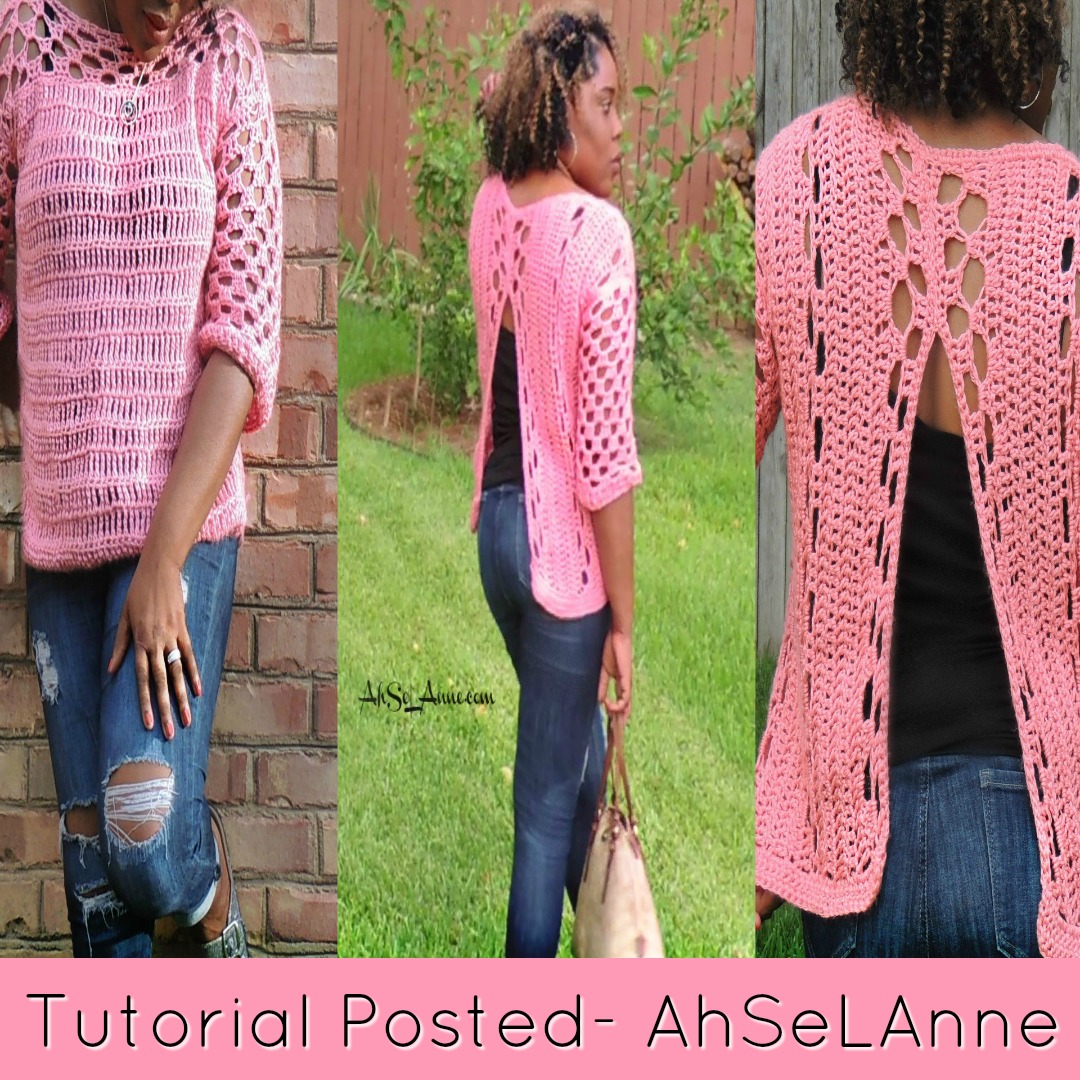
This is an advance beginner project but with the use of this pattern and the instructional video located the end of the post; the beginner crocheter should be able to work along.
For AD-Free Pattern Click Here:

Material:
-Yarn Suggestion- Caron Simply Soft –100% acrylic -Yarn (4 skeins -6 oz.)
-Hook- 5.5mm & 6.5mm
-Measuring Tape
–Yarn/Tapestry Needle
-Stitch Markers
–Scissors
Abbreviations (US Terms):
ch- chain
bp- back post double crochet
dc- double crochet
dtr- double treble crochet
fp- front post double crochet
3dc- 3 dc into next 3 stitches
lps- loop(s)
[pattern]- repeat stitches in [ ]
sc- single crochet
sk- skip stitch
sl st- slip stich
tw- turn work
yo- yarn over or yarn over the hook
Skill Level: 2- Intermediate
NOTES:
This Crochet Shirt was created for a person that is 5’5” with a Large/X-Large body size. Thus, these instructions have been written for a Large/XL. While this pattern can be customized it will be important that measurements are taken to ensure a proper fit.
The crochet shirt pictured is approx. 22” Width (L/XL) and 21” Long (22”x21”)
To Adjust Size:
Measure from shoulder to shoulder to determine the width.
Below Size Chart is an Approximation:
Small/Medium- 18” width
Large/XL- 22” width
2x-24” width
-Keep in mind, measure yourself (shoulder to shoulder) for the width and then chain enough to cover the distance, plus a few more. If you are making for someone else use the above measurements as a template.
For the length:
Front panel- determine the length you desire and continue the pattern until the desired length is obtained.
Back panel- the length is determined by the foundation chain.
(The front and back panels will need to the same length)
-In addition, the original crochet shirt was created using an acrylic yarn if another type of yarn is used you may need to adjust the measurement because different yarns have different stretch.
There are additional NOTES placed throughout the pattern, please be on the lookout for them. Also, an instruction video is linked below.
*At the bottom, there are additional tips and suggestions, for customizing the crocheted shirt.
Written Instructions:
PANEL A – (Front Panel)
Using a 5.5mm crochet hook
– Ch 60 plus 6 (66)
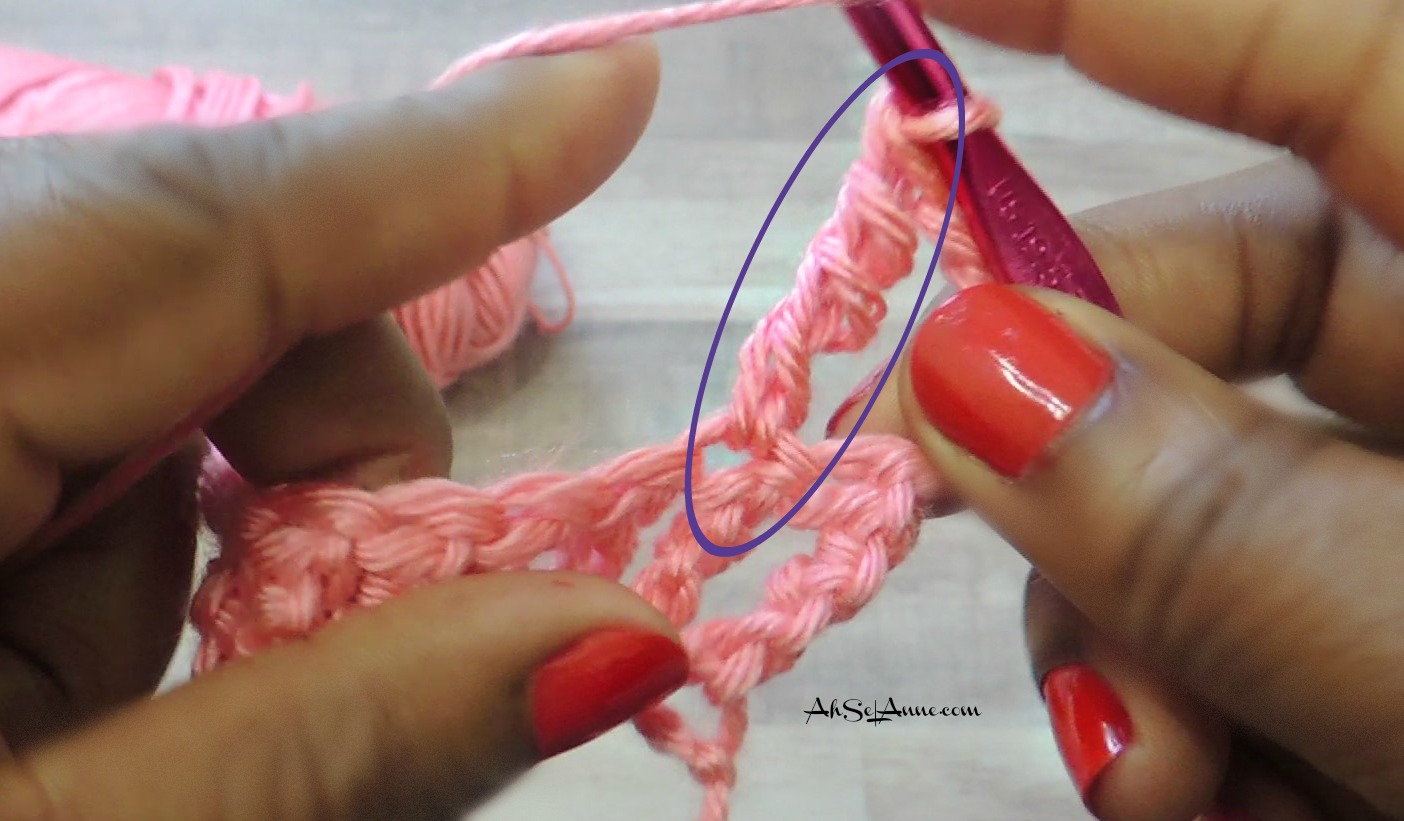
Row 1: dtr* in 6 stitch from hook, dtr in each stitch across, ch 5, tw
*dtr
-yo hook three times, then insert hook into stitch.

.
-yo hook and draw yarn through stitch [five loops on the hook]
-yo hook and draw through two lps, (there are now four lps remaining on the hook),
-yo hook, draw through two lps,
-yo hook, draw through two lps,
-yo hook, draw through two lps
(These series of steps are completed 4 times and will complete one dtr).
NOTE: The foundation chain, number of stitches, rows will vary based on individual measurements. Create your foundation chain with your personal measurements in mind (Even Number + 6) Measured 22”x 21”
Row 2: dtr in each stitch across (61 st) ch 5 will count as dtr, ch 5 tw
Row 3-17: repeat row 2.
Row 18: dtr in each stitch across (61 st), ch 3, tw
NOTE: Stitches should stack on top of each other from row to row.
Collar Area:
This area will repeat the pattern used to create the back panels (see below). There will be 5 rows.
NOTE: As with panel B & C, you will start and end the row with 2 dc.
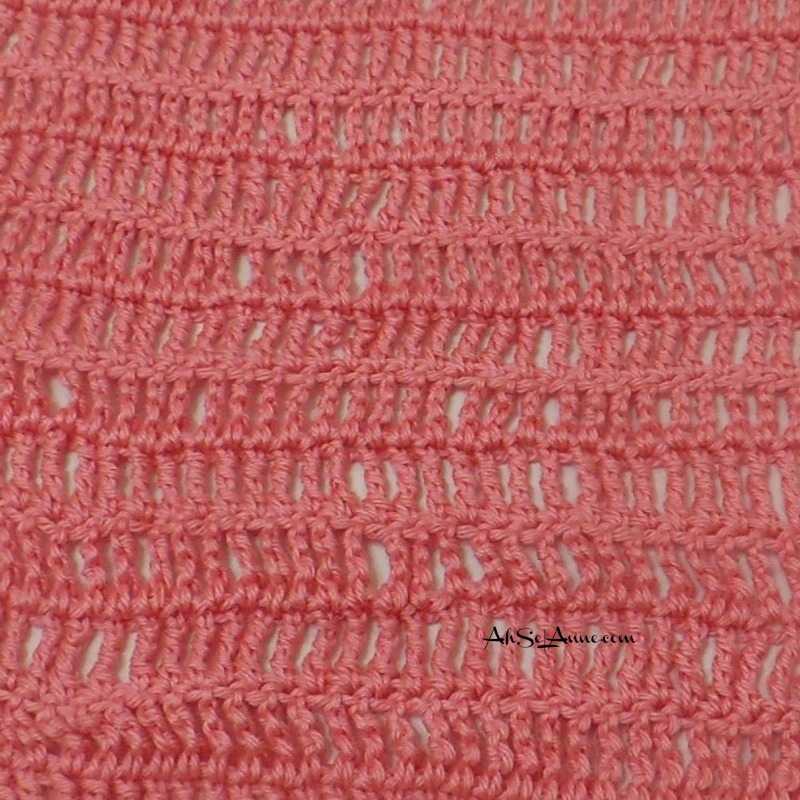
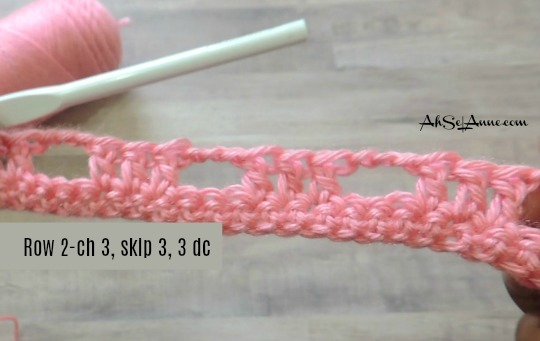
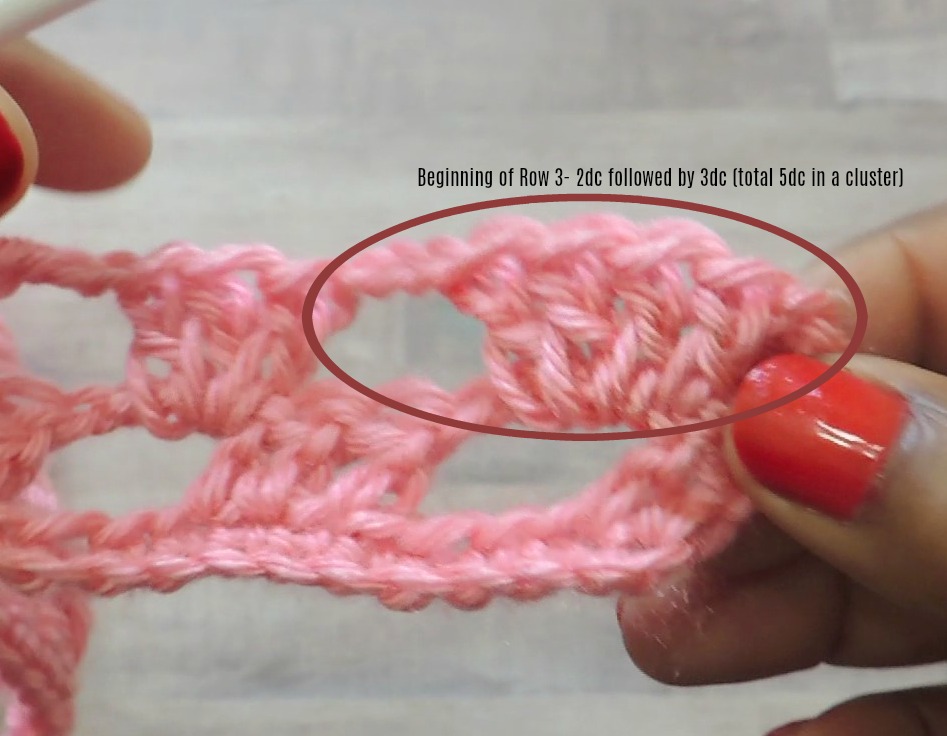
Row 19: dc into 2nd stitch (the ch 3 will count as 1 dc stitch), ch 3, sk 3, 3dc ( place 3 dc in the next 3 stitches), ch 3, sk 3, 3dc, [Pattern- ch 3,sk 3, 3dc], repeat pattern across, ending with dc in last stitch, ch 3, tw.
Row 20: dc into 2nd stitch, [3 dc, ch 3, sk 3], repeat pattern across, ending dc into last stitch, ch 3, tw, NOTE: In this row & row 22 you will have 5 DC at the beginning, 2dc plus 3dc.
Row 21: dc into 2nd stitch (the ch 3 will count as 1 dc stitch), [ch 3, sk 3, 3dc] repeat across, ending with dc into last stitch, ch 3, tw.
Row 22: dc into 2nd stitch, [3 dc, ch 3, sk 3], repeat pattern across ending dc into last stitch, ch 3, tw.
Row 23: dc into 2nd stitch (the ch 3 will count as 1 dc stitch), [ch 3, sk 3, 3dc] repeat across, ending with dc into the last stitch, finish off, weave ends.

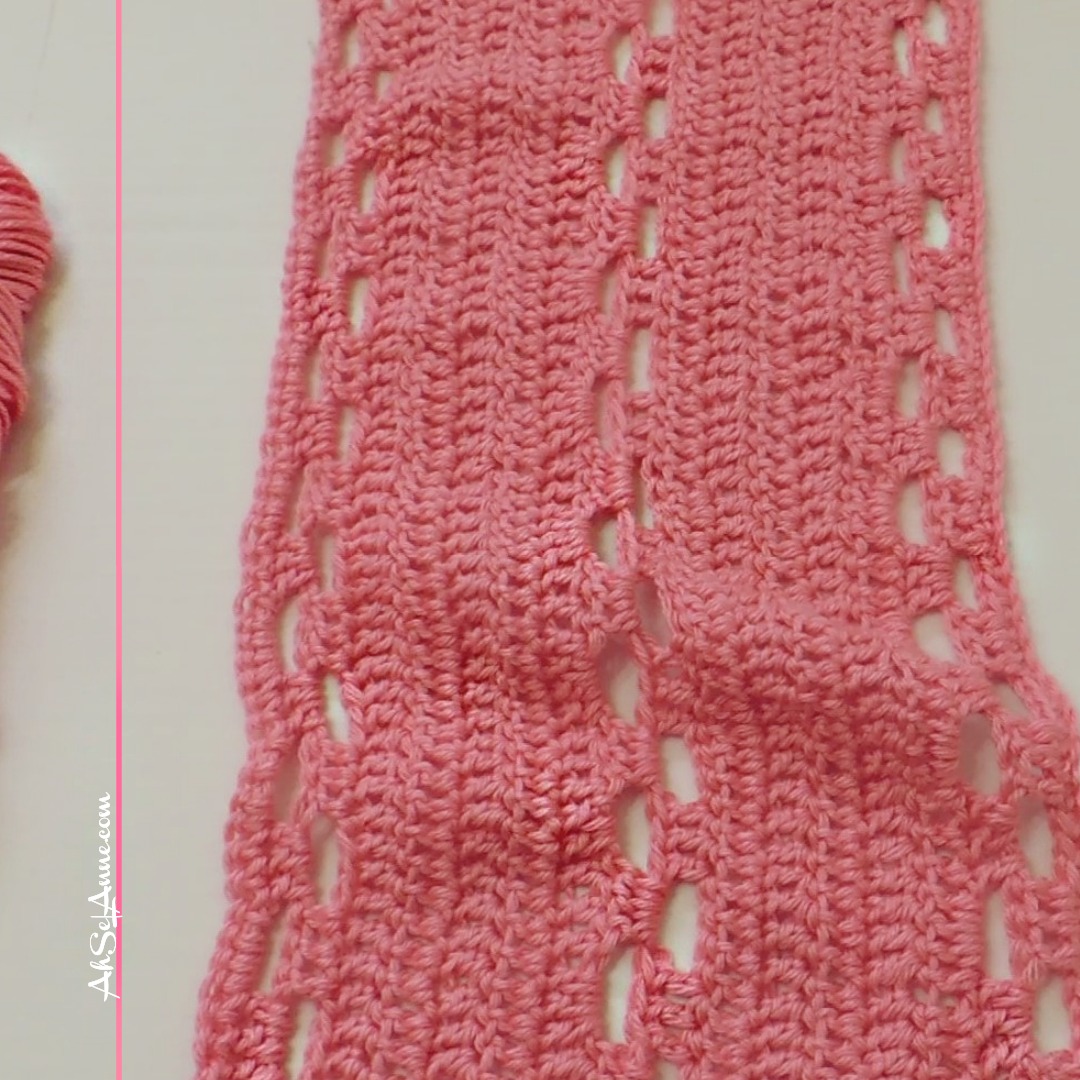
Back area -Panel B and Panel C
*make 2 panels
Use 6.5mm crochet hook
NOTE: Based on individual measurements the initial foundation chain can vary. Work in an even number, plus 3. Also, keep in mind, this section is worked horizontal and will be turned to the side. The length of your foundation chain will be the length of your garment. (Each panel measured approx. 11”x 21”)
Ch 60+3
Row 1: sc in 3rd stitch from hook and each stitch across, (61), ch 3 tw
NOTE: There will be 2 rows of the pattern [rows 2 & 3], followed by 5 rows of dc stitches, then 2 more rows of the pattern [repeat row 2 & 3], followed by 5 rows of dc stitches, ending with 2 rows of pattern.
Row 2: dc into 2nd stitch (the ch 3 will count as 1 dc stitch), ch 3, sk 3, 3dc,[ Pattern- ch 3,sk 3, 3dc], repeat across ending with dc, ch 3, tw.
NOTE: There should be 2 dc stitches at the beginning and the end.

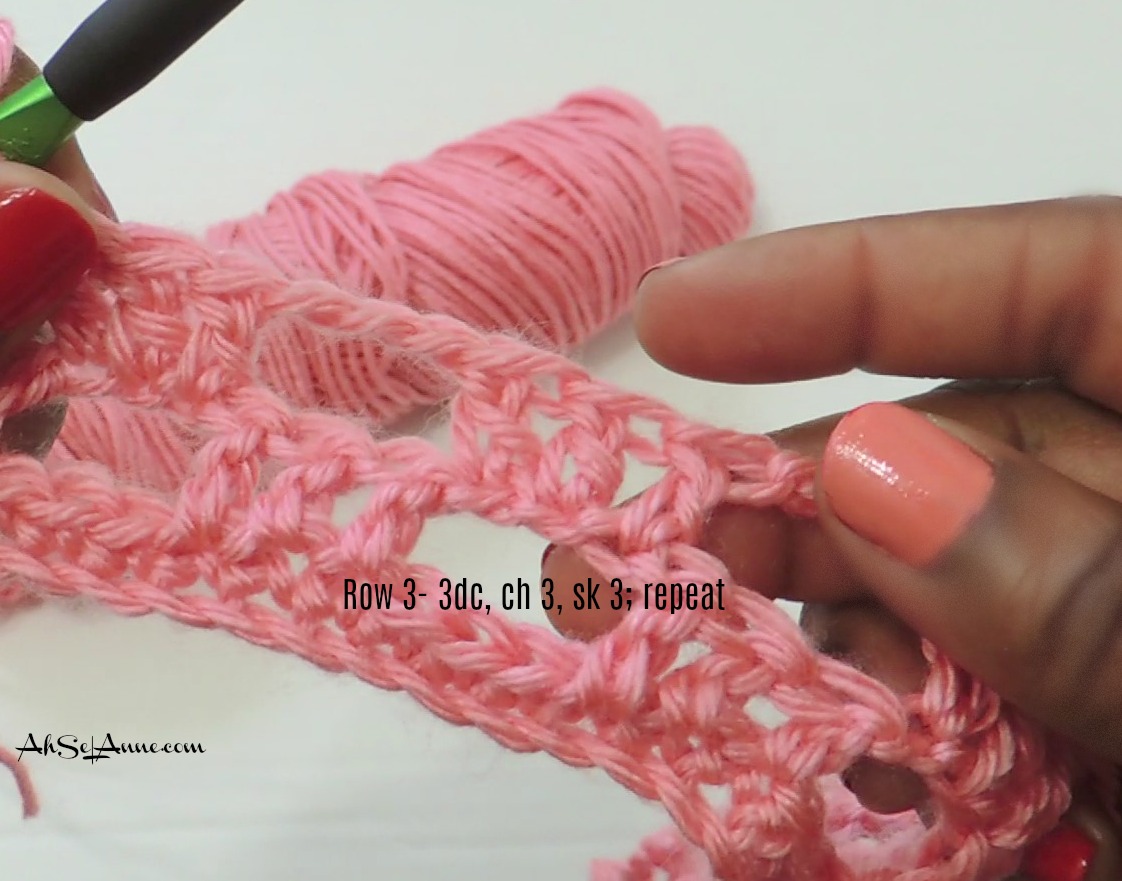
Row 3: dc into 2nd stitch, [3dc, ch 3, sk3], repeat pattern across, ending dc, ch 3, tw.
Note: In this row, you will have 5 DC at the beginning, ch 3, skipping over the cluster of 3 dc, then place 3dc into the ch 3 space, repeat.
Row 4: dc across (61) ch 3, tw.
Row 5: dc across (61) ch 3, tw.
Row 6: dc across (61) ch 3, tw.
Row 7: dc across (61) ch 3, tw.
Row 8: dc across (61) ch 3, tw.
Row 9: dc into 2nd stitch (the ch 3 will count as 1 dc stitch), [ch 3, skip 3, 3 dc], repeat across ending with dc, ch 3, tw.
NOTE: There should be 2 dc stitches at the beginning and the end.
Row 10: dc into 2nd stitch, [3 dc, ch 3, sk 3], repeat [pattern] across, ch 3, tw.
Row 11: dc across (61) ch 3, tw.
Row 12: dc across (61) ch 3, tw.
Row 13: dc across (61) ch 3, tw.
Row 14: dc across (61) ch 3, tw.
Row 15: dc across (61) ch 3, tw.
Row 16: dc into 2nd stitch (the ch 3 will count as 1 dc stitch), [ch 3, skip 3, 3 dc], repeat across ending with dc, ch 3, tw.
Row 17: dc into 2nd stitch, [3dc, ch 3, sk 3], repeat pattern across ending dc into last stitch, ch 3, tw.
Row 18: sc across, (61)
*Repeat for Panel C
Optional Trimming:
Along the bottom of Panel B and C complete 3 rows of sc stitches. Keep in mind this will lengthen the garment by an approx. 1 ½”.
– Tie yarn to a corner, sc across evenly (38)
NOTE: Since this is a raw edge be sure to space the sc stitches evenly, counting as you go along, to ensure you create the same number of stitches in the next 2 rows. I had 38 but yours may be a little different, just make sure you stay consistent with both panels.

*TIP: Using a whip stitch, seam panel B & C together, approximately 1/2” down the center.
Once the panels are seamed together, place a row of sc stitches across the top. This will make it easier to seam to the front panel.
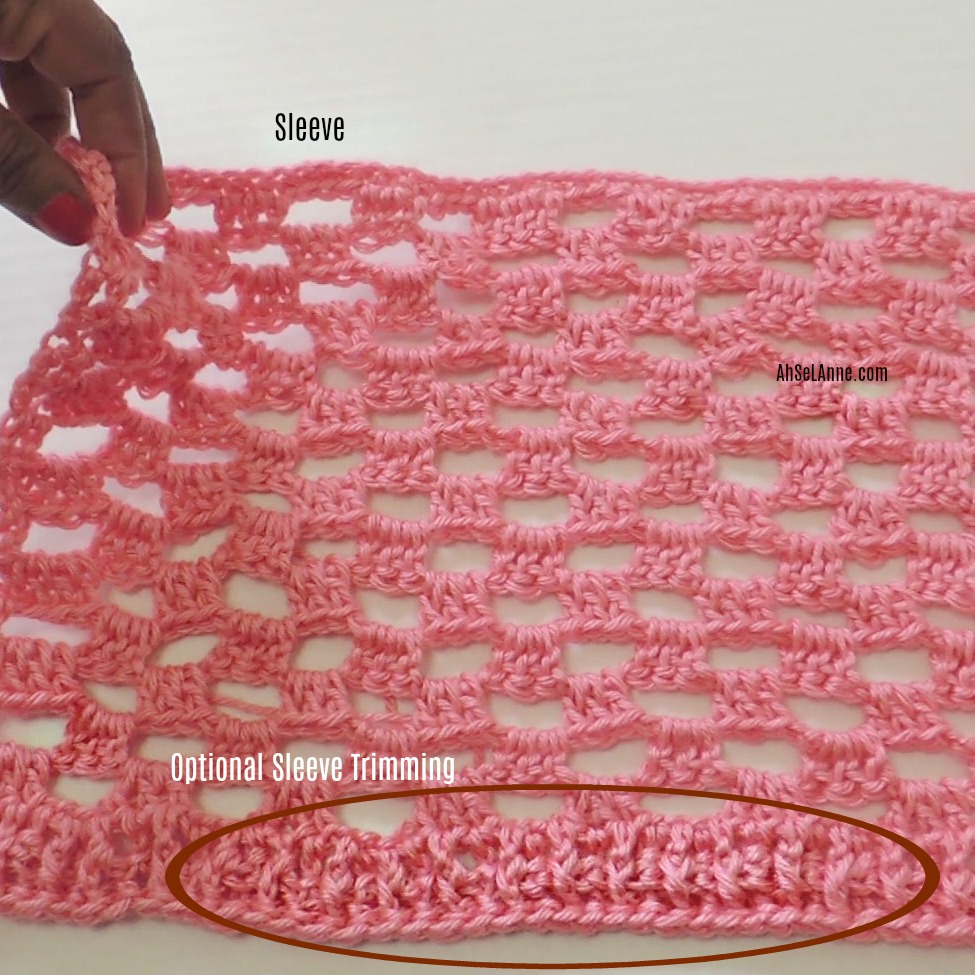
Sleeves
*make 2 sleeves
NOTE: As with panel B & C, you will start and end, the row, with 2 dc
Ch 50+3
Row 1: Into 3rd stitch, sc across (51 stitches), ch 3, tw.
Row 2: dc into 2nd stitch (the ch 3 will count as 1st dc stitch), [ch 3, sk 3, 3dc], repeat pattern across ending with dc into last stitch, ch 3, tw.
Row 3: dc into 2nd stitch, [3 dc, ch 3, sk 3], repeat pattern across ending dc into last stitch, ch 3, tw. Note: In this row you will have 5 DC at the beginning, skipping over the cluster of 3dc, ch 3, place 3 dc into the ch 3 space, repeat.
NOTE: Rows 2 & 3 are the repeater pattern, alternate between these 2 rows until you reach Row 15. (Written out below).
Row 4: dc into 2nd stitch (the ch 3 will count as 1 dc stitch), [ch 3, sk 3, 3dc], repeat pattern across ending with dc into last stitch, ch 3, tw.
Row 5: dc into 2nd stitch, [3 dc, ch 3, sk 3], repeat pattern across ending dc into last stitch, ch 3, tw.
Row 6: dc into 2nd stitch (the ch 3 will count as 1 dc stitch), [ch 3, sk 3, 3dc], repeat pattern across ending with dc into last stitch, ch 3, tw.
Row 7: dc into 2nd stitch, [3 dc, ch 3, sk 3], repeat pattern across ending dc into last stitch, ch 3, tw.
Row 8: dc into 2nd stitch (the ch 3 will count as 1 dc stitch), [ch 3, sk 3, 3dc], repeat pattern across ending with dc into last stitch, ch 3, tw.
Row 9: dc into 2nd stitch, [3 dc, ch 3, sk 3], repeat pattern across ending dc into last stitch, ch 3, tw.
Row 10: dc into 2nd stitch (the ch 3 will count as 1 dc stitch), [ch 3, sk 3, 3dc], repeat pattern across ending with dc into last stitch, ch 3, tw.
Row 11: dc into 2nd stitch, [3 dc, ch 3, sk 3], repeat pattern across ending dc into last stitch, ch 3, tw.
Row 12: dc into 2nd stitch (the ch 3 will count as 1 dc stitch), [ch 3, sk 3, 3dc], repeat pattern across ending with dc into last stitch, ch 3, tw..
Row13: dc into 2nd stitch, [3 dc, ch 3, sk 3], repeat pattern across ending dc into last stitch, ch 3, tw.
Row 14: dc into 2nd stitch (the ch 3 will count as 1 dc stitch), [ch 3, sk 3, 3dc], repeat pattern across ending with dc into last stitch, ch 3, tw.
Row 15: dc into 2nd stitch, [3 dc, ch 3, sk 3], repeat pattern across ending dc into last stitch, ch 3, tw.
Row 16: dc across, ch 1, tw
Row 17: slip stitch across, finish off, weave ends
REPEAT Rows 1- 17 for 2nd Sleeve
Optional Sleeve Trim:
You can trim the sleeve area with a FP/BP DC stitch. This is an optional step and is not necessary for the completion of your v-back crochet shirt.
After Row 16 complete FP/BP DC stitch alternating down the row, ch 1, tw
Row 17: Slip Stitch across, finish off, weave ends
Fold the sleeve in half, secure with stitch markers, seam area will be facing down. Set to the side to attach to the shirt during the assembly process.
Assembly
-Once all the panels have been created, front panel, 2 back panels* and 2 sleeves*, it’s time to seam your garment together.
-Align the two back panels with the front panel. Measure across the top 7” from left and 7” from right, leaving approximately 8” for the neck area.
-Using stitch markers, secure the panels together, to prepare for seaming.
-Along the left and right raw edge, measure 7 ½” from the top of the front and back panel to determine the arm area.
-Place stitch markers along the side, to indicate the area that needs to be seamed together. Making sure to leave the 7 ½” opening for the arms.
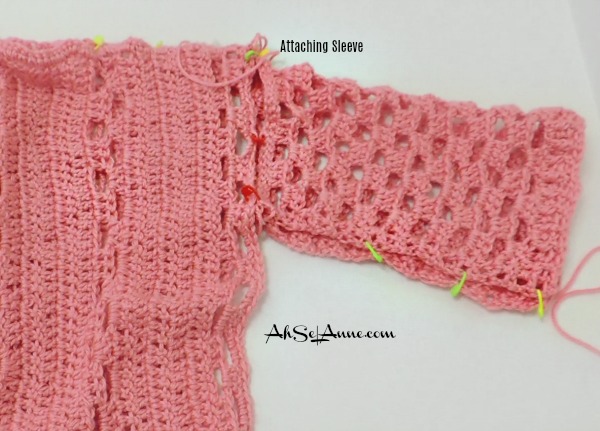
– Cut a spare piece of yarn twice the length of the area that you will be sewing.
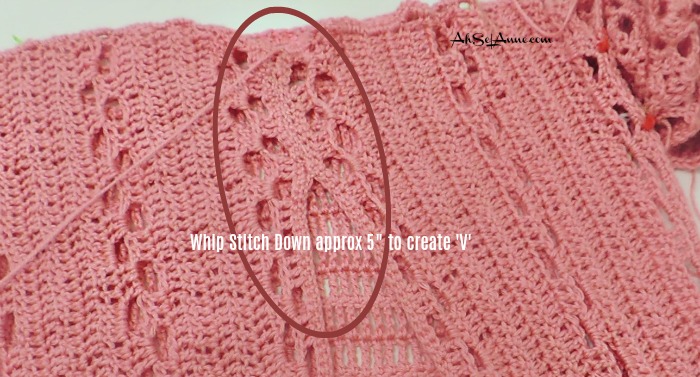
– With a tapestry needle, use a whip stitch to seam up the raw edges along the top (for the shoulders), the side, and 5” down the center to create the “V”, where these pieces meet each other. Insert your needle through both loops of each piece.
Seaming the garment together will take some time but make sure you line your pieces up carefully to ensure everything comes together correctly.
I seamed up and down, in all areas, to ensure everything remains together.
Assembly and Customizing Tips:
-If you put your garment together and the front and the back panels don’t align properly, you can adjust by adding rows, using the single crochet stitch. You can add rows to the bottom, to make longer or along the sides (back panels) to make it wider. The goal is for all pieces to measure the same.
– The back panels will measure ½ the width of the front panel. When added together they will equal the total width of the front panel. For instance, if your front panel measures 20” wide, then your back panels will need to be 10” wide, each.
For More Tips and AD-Free Pattern: Click Here
Video Tutorial Below:
Enjoy Your New V-Back Crochet Shirt!