
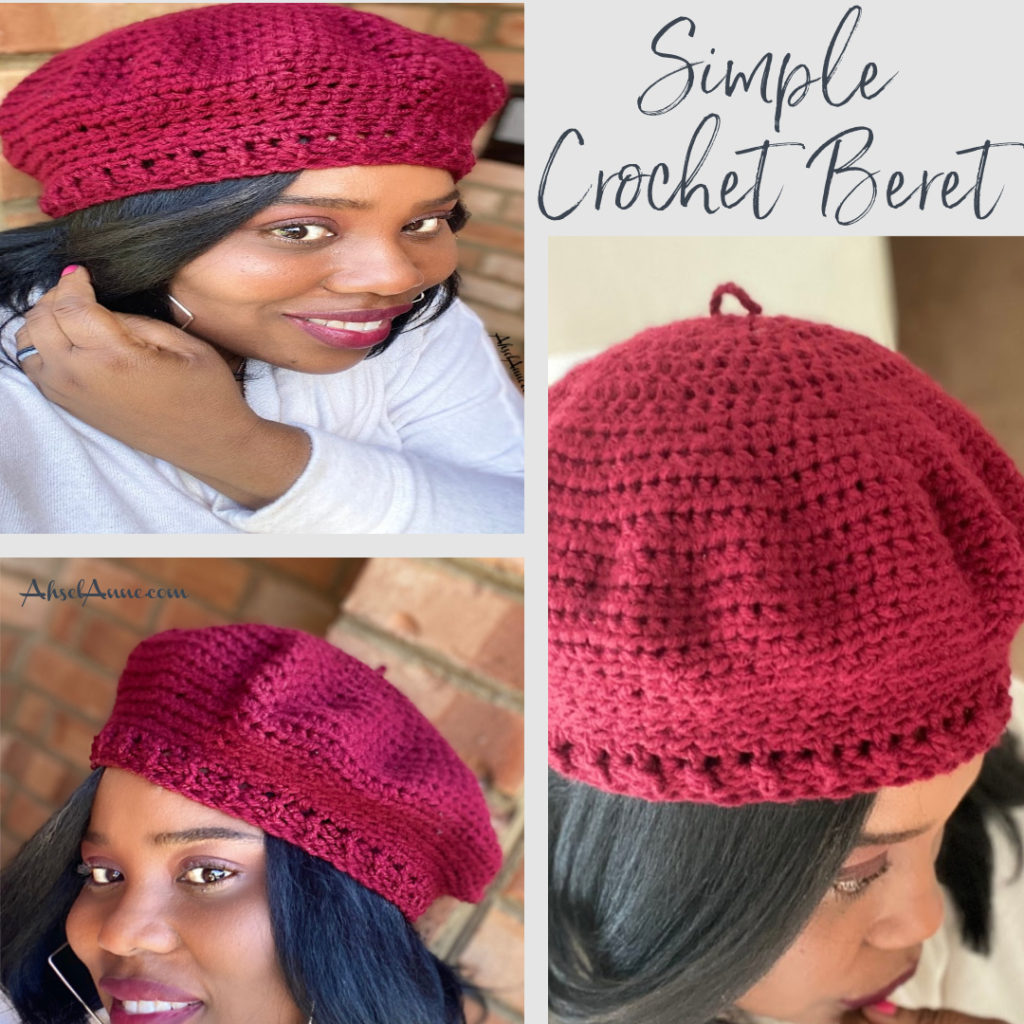

Simple Crochet Beret, Ooh La-La
I absolutely love Learning, Creating, and Sharing. Check out my Disclosure for the details.
Simple Crochet Beret, Ooh La- La.
Add this stylish crochet beret to your wardrobe by using a few easy-to-create crochet stitches and for an added touch of style, I’ve added a ribbed stitch headband to create a textured look. This pattern is not only fashionable it is easy to create.
Scroll down and I’ll share with you my simple pattern. There is also a video tutorial available to help you along.
 YARN
YARN
Type of Yarn:
Big Twist Yarn or Red Heart Soft Yarn- Colorway- Wine
Mandala Ombre’ Yarn- Harmony
Yarn Characteristics:
Big Twist Yarn is a worsted yarn 100% acrylic yarn. This is a durable- value-priced yarn that is machine washable yarn. Perfect for berets, sweaters, blankets, and more.
Redheart Soft Yarn is similar to the Big Twist Yarn, 100% acrylic durable and valued price; however, it is readily available on the ground and online.
Mandala Ombre Yarn from Lion Brand is a beautiful yarn that changes color subtly. It is a slightly thicker yarn than the original Mandala Yarn. It’s 100% acrylic and is a 4-weight Yarn.
Colorway:
Big Twist Yarn- Wine
Red Heart Soft Yarn- Wine
Mandala Ombre- Harmony
Note:
I’ve made berets using the yarns listed above. All suggested yarns works up nicely. The Mandala Ombre yarn was slightly softer and I love the gradual color change.
You’ll only need one skein of either yarns; all is fair in love and yarn. While all three yarns are a great choice, pick up any 4-weight yarn that you love, and let’s get started.
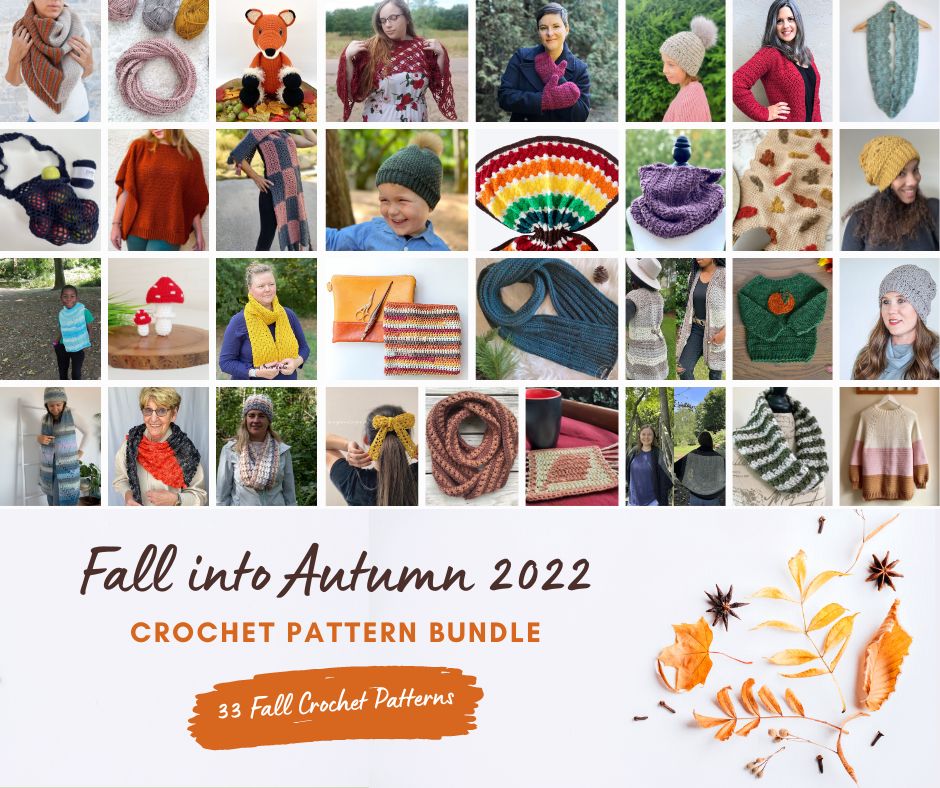
Do You Want 33 Fall Inspired Patterns for the Low? Checkout the Fall Crochet Bundle Package
ADULT M/L (Size Created using Pattern)
1 Skein of Yarn, approximately 140-175 yards, 4-weight acrylic yarn


For an Ad-Free PDF Version of this Pattern Click Here, Etsy
For an Ad-Free PDF Version of this Pattern Click Here, Ravelry
VIDEO TUTORIAL
A video tutorial is available for this pattern; scroll down to see the tutorial.
PATTERN DETAILS
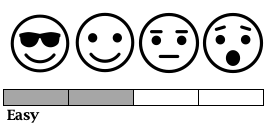
Skill Level
For a better understanding of skills, and learning Click Here. You’ll be led to the Craft Yarn Council for a deeper dive into skill levels.
This is a project for the advanced beginner. If you are new to crocheting you need to be comfortable completing a single crochet, half double crochet, double crochet and working in a round.
Techniques:
Magic Circle- Check out this video Tutorial: Click Here
Front Post/Back Post DC- Check this video Tutorial Click Here
NOTES
• This pattern is written in US terms and there is a key provided, to help with any abbreviations.
• Additional NOTES are placed throughout the pattern, for additional tips and instructions.
• There are hyperlinks included, within this pattern. If viewing, on an electronic device, you can click on the link(s), and you will be taken to the products used and helpful instructional video(s).
• Beginning chain counts as a stitch, in the overall stitch counts; unless Noted in Pattern.
• Increase and Decrease rounds are necessary to complete this pattern.
• [ ] denotes the stitch count at the end of the row.
• *_* Denotes repeat sequence- Example: *2hdc, 1 hdc* – 2hdc followed by 1 hdc repeats throughout the round.
MATERIALS
Hook
Crochet Hook 5.5 mm/U.S J/10- Furl Odyssey
Notions
Yarn Needle
Scissors
Stitch Markers
Measuring Tape

Finished Measurement
The finished product is sized Adult Large/XL-23″
This project can be customized to fit multiple sizes.
Pictures displayed in the pattern have a head measurement of an Adult Large Size 23”. (Measurement/Circumference is approximately 22”-23”).
GAUGE
Rounds 1-4 DC = 4 ½”/11.5cm

PATTERN ABBREVIATIONS (US Terms)
English (US) Terms
bpdc- back post double crochet
ch(s)- chain(s)
dc- double crochet
fpdc- front post double crochet
hdc-half double crochet
hdc2tog- Half Double Crochet 2 Together/ hdc decrease
round- Rnd
sc- single crochet
sl st- slip stitch
st(s)- stitch(es)
tw- turn your work
2dc- place 2 double crochet stitches into the ‘same’ stitch
2hdc- place 2 half double crochet stitches into the ‘same’ stitch

Half Double Crochet Decrease (hdc2tog )-Yarn over Insert hook, yarn over, pull through, insert hook in NEXT chain, yarn over, pull through, yarn over, draw through 3 loops on your hook (this will decrease 2 stitches to 1 stitch).
Magic Circle– an adjustable loop (or ring) technique that has a yarn tail that pulls to close, allowing the center hole to seal tightly closed.
Front Post and Back Post Double Crochet Stitch
Fpdc/bpdc are worked around post stitches, insert your hook around the post of the stitch.


For Ad Free Version of this Pattern:

WRITTEN PATTERN FOR SIMPLE CROCHET BERET, OOH LA-LA
NOTE: The ch 3 or ch 2 will count as the first stitch in the round unless otherwise stated.
Complete Magic Circle, ch 3 ‘OR’ Complete Foundation Circle – ch 4, join with sl st in first ch to form a ring, ch 3
Rnd 1: Place 11 dc into the magic circle (the ch 3 will count as your first dc), pull the circle close, sl st in the first dc to join. [12]
INCREASE ROUNDS 2-10
Rnd 2: ch 3, into the same stitch as the ch 3, 1 dc, 2dc into next stitch, 2dc, in the next; *repeat 2dc* in each stitch around, sl st in the first dc to join. [24]
Rnd 3: ch 3, 2dc next stitch, 1 dc, 2dc; *Repeat 1 dc, 2dc*, each stitch around, sl st in the first dc to join. [36] End with 2dc, in the same space
Rnd 4: ch 3, 2dc in next stitch, 1 dc, 1 dc, 2dc, 1 dc,
1 dc, *Repeat 2dc, 1 dc, 1 dc*, each stitch around, sl st in the first dc to join. [48] End with 1 dc
Rnd 5: ch 3, 2dc in next stitch, 1 dc, 1 dc, 1 dc; 2dc, 1 dc, 1 dc,
1 dc, *repeat, 2dc, 1 dc, 1 dc, 1 dc*; each stitch around, sl st in the first dc to join. [60] End with 2 dc
Note: Change to HDC stitch
Rnd 6: ch 2; 2hdc in next stitch, 1hdc, 1hdc, 1hdc, 1hdc ;2hdc, 1 hdc, 1 hdc, 1 hdc, 1 hdc; *repeat 2hdc, 1hdc, 1hdc, 1hdc, 1hdc*; each stitch around, sl st in the first hdc to join. [72] end with 3 hdc
Rnd 7: ch 2; 2hdc in next stitch, 1 hdc, 1 hdc, 1 hdc, 1 hdc, 1 hdc; 2hdc, 1 hdc, 1 hdc, 1 hdc, 1 hdc; 1 hdc; *repeat 2hdc, 1 hdc, 1 hdc, 1 hdc, 1 hdc,1 hdc*; each stitch around, sl st in first hdc to join. [84] end with 4 hdc
Rnd 8: ch 2; 2hdc in next stitch, 1 hdc, 1 hdc, 1 hdc, 1 hdc, 1 hdc,
1 hdc; 2hdc, 1 hdc, 1 hdc, 1 hdc, 1 hdc, 1 hdc; 1 hdc; *repeat 2hdc, 1 hdc, 1 hdc, 1 hdc, 1 hdc, 1 hdc, 1 hdc*; each stitch around, sl st in first hdc to join. [96] end with 5 hdc
Rnd 9: ch 2; 2hdc in next stitch, 1 hdc, 1 hdc, 1 hdc, 1 hdc, 1 hdc,
1 hdc, 1 hdc; 2hdc, 1 hdc, 1 hdc, 1 hdc, 1 hdc, 1 hdc, 1 hdc; 1 hdc; *repeat 2hdc, 1 hdc, 1 hdc, 1 hdc, 1 hdc, 1 hdc,1 hdc, 1 hdc*; each stitch around, sl st in first hdc to join. [108] end with 6 hdc
Rnd 10: ch 2; 2hdc in next stitch, 1 hdc, 1 hdc, 1 hdc, 1 hdc, 1 hdc, 1 hdc, 1 hdc, 1 hdc; 2hdc, 1 hdc, 1 hdc, 1 hdc, 1 hdc, 1 hdc, 1 hdc, 1 hdc, 1 hdc; *repeat 2hdc, 1 hdc, 1 hdc, 1 hdc, 1 hdc, 1 hdc, 1 hdc,1 hdc, 1 hdc in each stitch*; each stitch around; sl st in first hdc to join, [120] end with 7 hdc
Note
Rnd 10 was the final increase round. You can stop increasing at any point, once you get to the desired circumference. The 10th round measured approx. 10” across.

Add another easy crochet project to your list? Try this next:
Rnd 11: ch 2, hdc in each stitch around, sl st to join each round. [120]
Rnd 12: ch 2, hdc in each stitch around, sl st to join each round. [120]
Rnd 13: ch 2, hdc in each stitch around, sl st to join each round. [120]

DECREASE ROUNDS 14-17
Note
- Decreasing can be completed in different ways.
- The goal is to take the Beret down from 120 stitches to 60 stitches. Starting with round 14 and continuing until round 17.
- Each round will decrease by 15 stitches. This will make the final decrease round, measure approx. 7.5” across. (This is the Diameter size to fit an Adult’s Large Head Size).
- If you are altering this pattern, you will increase until you reach the desired head circumference and then decrease until you reach the round that fits the circumference/head measurement for your head.
Option 1 for Decrease Rounds
Chain 2; 1 hdc in each of the next 7 stitches. Crochet a Half Double Crochet Decrease* (hdc2tog) in the next 2 stitches. Keep repeating from the *. Sl St to join to the first half double crochet.
Option 2 for Decrease Rounds
Skip over stitches, throughout the round, to decrease. Be sure to decrease by a total of 15 stitches.
Example for Option 2: (Skipping one stitch every 8th stitch). 1hdc, 1hdc, 1hdc, 1hdc, 1hdc,1hdc, 1hdc, skip a stitch, repeat hdc each stitch skipping the 8th stitch continue around, sl st to join round.
Rnd 14: Ch 2 ,*1 hdc in each of the next 7 stitches. Skip the 8th, [repeat from the *]. Sl St to join to the first half double crochet. [105]
Rnd 15: ch2, *1 hdc in each of the next 6 stitches. Skip the 7th, [repeat from the *.] Sl St to join to the first half double crochet. [90]
Rnd 16: ch2, *1 hdc in each of the next 5 stitches. Skip the 6th, [repeat from the *]. Sl St to join to the first half double crochet. [75]
Rnd 17: ch2, *1 hdc in each of the next 4 stitches. Skip the 5th, [repeat from the *]. Sl St to join to the first half double crochet. [60]

BRIM
Rnd 18: ch2, hdc each stitch around. Sl st to join. [60]
Rnd 19: ch3, dc each stitch around. Sl st to join. [60]
Rnd 20: ch3, Alternate between fpdc and bpdc, each stitch around; sl st to join to the first double crochet, ch 1 [60]
Note:
Place a stitch marker in the ch 1 space to ensure you keep your place.
Rnd 21: sc each stitch around, sl st to join round. Place stitch marker if continuing to Rnd 21. [60]
Optional Rounds
Either option will tighten the Beret. This is not a necessary step if the hat fits comfortably around your head.
There are a couple of options to tighten your Beret if needed:
Option 1:
Rnd 21: sl st each stitch around; join rounds.
Option 2:
In Rnd 20, above, sk a few stitches as you work around to decrease from 60 stitches to 56. This action will also tighten the Beret.
Note: You do not have to do both options. The Ooh, La-La Crochet Beret is created for an Adult.
Optional Loop – at the Top of Beret

Use the tail from the Magic Circle or attach a piece of yarn (12 inches) at the top of the Beret.
Create a chain of 6 or 7 stitches, and fold the chain in half. Finish off, leaving a tail, to secure the loop.
Using the yarn needle, sew down the looped chain to the top of the beret to secure the loop.

VIDEO TUTORIAL
Check out the video for visual instructions. Enjoy your Ooh, La-La Beret
I really like how you’ve given different options on how to do a couple things in this pattern and think you’ve done a great job writing it out. I’m just wondering if you’ve made berets using both methods of decrease and if so which one you prefer and why.
beautiful pattern…very well explained. Thank youy
Thank you! ?:-)