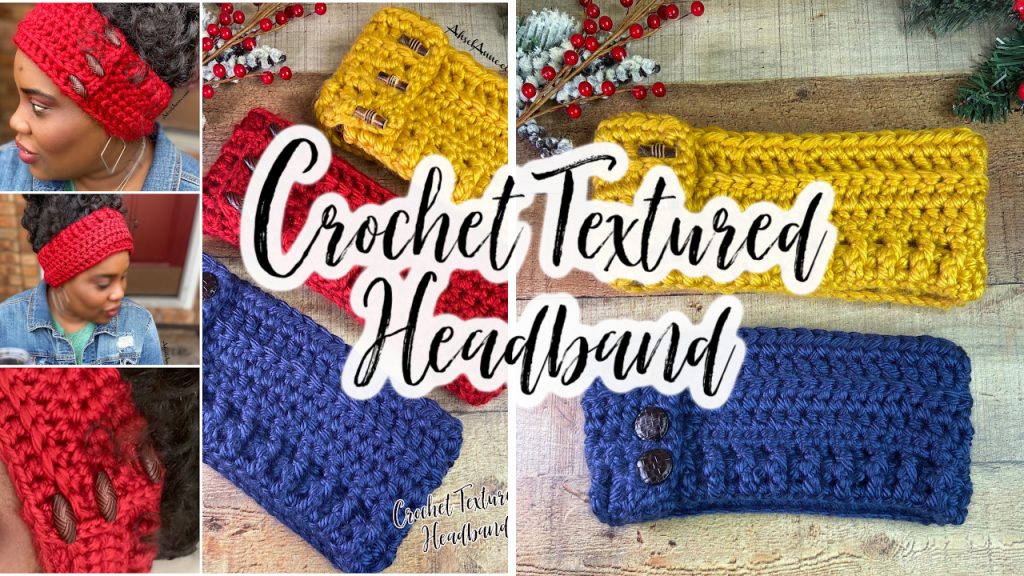

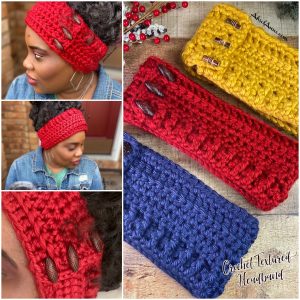
Crochet Textured Headband
Crochet Textured Headband, anyone? The Crochet Headband is so stylish and easy to create, everyone will be asking you to make them one. Scroll down and I’ll share with you my simple pattern to create a crochet headband that can double as ear warmers.
Stop you can get a free PDF of this pattern as a part of the Epic 2020 Giveaway. Starting December 1st through December 30, 2020. You can enter to win, not only this pattern but so many other Awesome Prizes.
Click Here for details!!!!
This crochet headband pattern is a beginner-friendly project and can be adjusted for size. I used a thick and chunky yarn that makes this not only a cozy crochet creation, but it works up quickly. How quick? It can be made in under an hour!
A video tutorial, on the creation and construction, can be found below.
All About the Yarn:
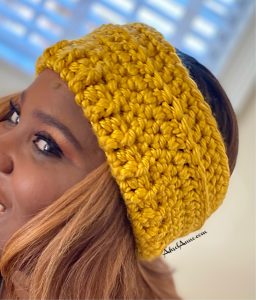
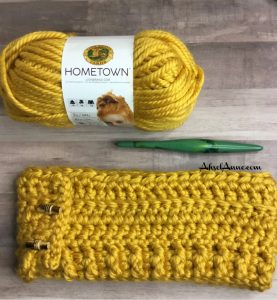
I opted to use Hometown Yarn by Lion Brand. This chunky hometown yarn is ideal because of it’s soft textured and light sheen. It can make your project appear expensive, even though the yarn is a great value…sshh.
You’ll only need one skein and there are plenty of yarn colors to choices.
However, all is fair in love and yarn, so pick-up any bulky 6 yarn and let’s get started.
PATTERN
NOTE:
This pattern is written in US terms and there is a key provided, to help with any abbreviations.
There are hyperlinks included, with this pattern. You can click on the links and you’ll be taken to products used to create this crochet headband.
MATERIALS
– Hometown Yarn- Lion Brand Madison Mustard
– Crochet Hook- 8MM
– Crochet Hook -6MM (optional)
– Yarn Needle
– Scissors
– Buttons (Optional)
ABBREVIATIONS (US TERMS):
ch- chain
dc- double crochet
blo- back loop only
bpdc- back post double crochet
fpdc- front post double crochet
hdc-half double crochet
sc- single crochet
sl st- slip stitch
st(s)- stitch(es)
tw- turn your work
MEASUREMENT
The finished product measured approx. 11” in length (folded) and 4”.

Please Note: This is worked in rows and then fasten with buttons to create the adjustable option.
Measure the circumference of your head and this number will be the length of your foundation chain, in inches (or cm). 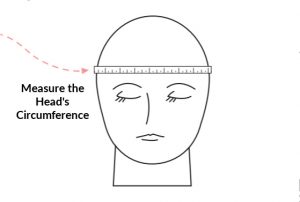
My Circumference was approximately 22”-23”, my foundation was 50 stitches.


WRITTEN PATTERN:
Ch 50+3
1. Row 1: 4th stitch from the hook place dc, then dc in each stitch across; the ch of 3 will count as your first dc (50), Ch 3 tw.
2. Row 2: Alternate fpdc, bpdc down the row. Ending the row with a dc stitch. ch 1, tw.
Perfect Crochet Candle for your holiday decor: Checkout this fun tutorial.

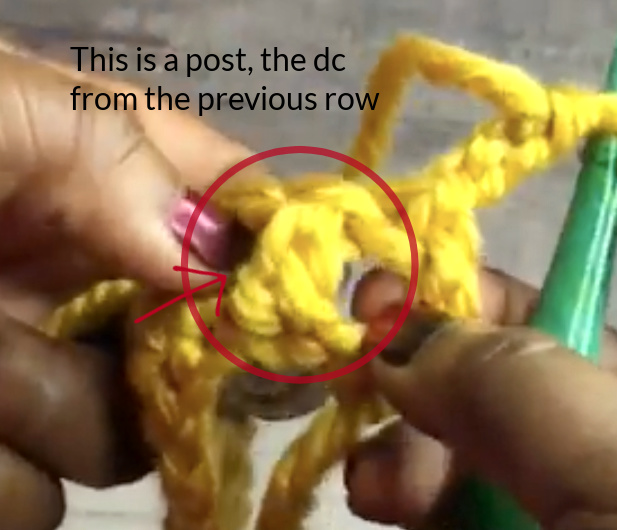
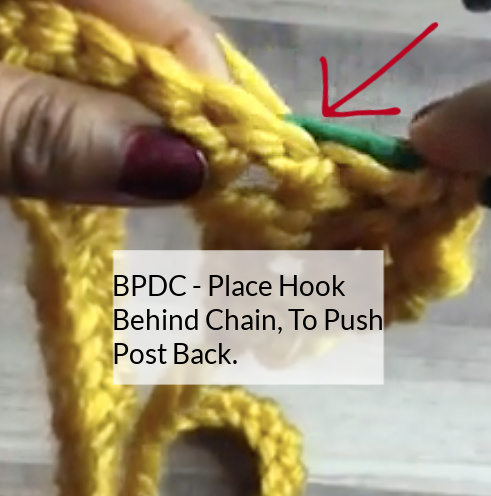
Front Post and Back Post Double Crochet Stitch
fpdc/bpdc – for post stitches, you insert your hook around the post of the stitch. Pushing the post forward or backward depending on the stitch.
Check-out another great pattern for a crochet turban.
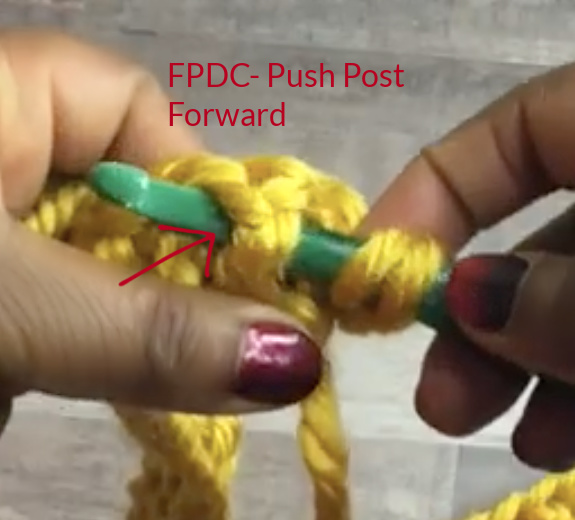
Bpdc – Insert hook from the back to the front of the post, pushing the post to the back
3. Row 3: sc in each stitch across. (Make sure to put a sc in ch space), ch 2 tw.
4. Row 4: hdc in each stitch across, ch 3 tw,
5. Row 5: dc in each stitch across, ch 3 tw.
6. Row 6: dc in each stitch across blo, dc into last stitch of the row, ch 2 tw.
Row 7: HDC each stitch across, finish off. Leave attached to the skein and work optional step below
Optional Step:
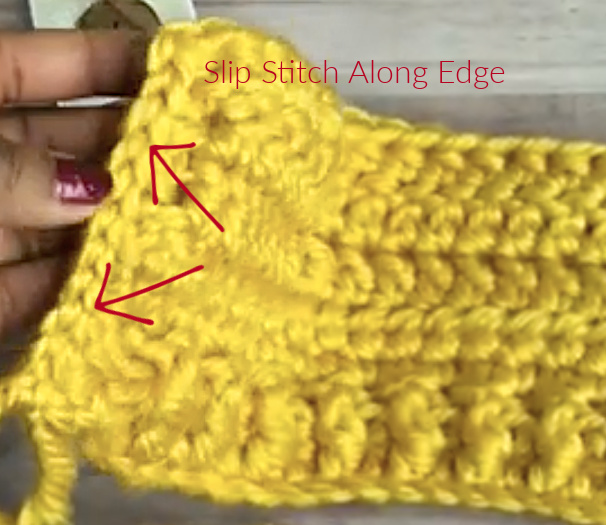
Note: While this is an optional step, I highly recommend this step to square off the edges and make the finished project more polished
Switch Crochet Hook (Optional) size 6mm
Turn work to the side and slip stitch along the raw edge. (This will make the edge appear more polished).
NOTE: There were approximately 10 sl sts along the side, but this can vary depending on your headband. You will just place a stitch in a space, leaving no gaps.
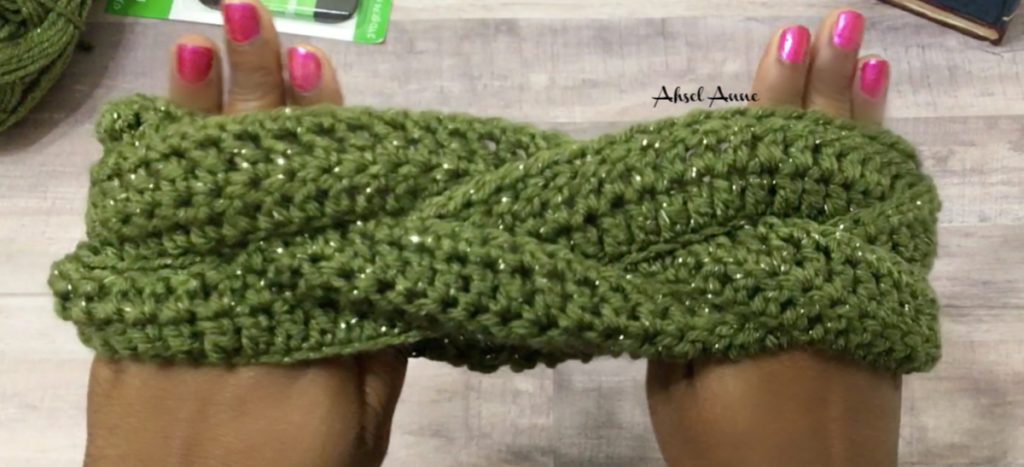
Form and shape headband to even rectangle and either sew edges together or attached buttons to make adjustable
Let’s Make Another Headband
 https://ahselanne.com/2020/05/06/crochet-braided-headband/
Attaching the Buttons
Measure or estimate approximately 1.5”, from the top and bottom of the crochet headband and attach buttons, using yarn and the yarn needle.
There should be approx. 1.5” -2” between the buttons. Enjoy your Crochet Golden Texture Headband!!

Need a little more instruction, check out this video tutorial:
Feel free to make and sell products from my patterns but please give credit to AhselAnne for the pattern. Please do not copy and post this pattern and claim it as your own. Please do not re-publish photos as your own. Distribution or sharing of this pattern pdf in any way is not permitted – if you like, please share the free version of this pattern from my blog, ahselanne.com. Thanks!
2 thoughts on “Crochet Textured HeadBand”