


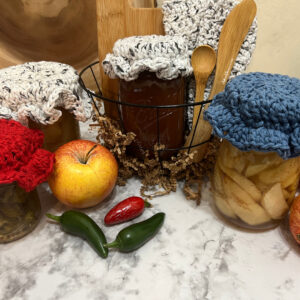
Mason Jar Crochet Covers- Perfect Addition to a Handmade Gift
Mason Jars are classic and versatile. They are perfect for preserving fresh food, storing small items, or creating thoughtful gifts. Creating Crochet Mason Jar Covers is a perfect addition to any DIY gift. Scroll down and I’ll share with you my easy-to-follow pattern. There is also a video tutorial available to help.
I absolutely love Learning, Creating, and Sharing. Check out my Disclosure for the details
YARN
Type of Yarn:
Big Twist
Sugar & Cream
Peaches & Cream
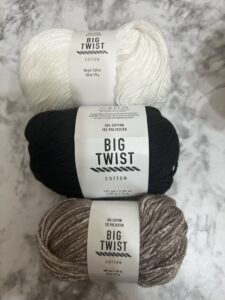
Yarn Characteristics:
Cotton yarn is absorbent and will hold up well with this project. It’s durable, machine washable and dryable.
100% Cotton or Cotton Blend 85%
100g
131Yards
Colorway:
Any color will work.
Cotton Yarn or Cotton Yarn Blends come in an array of colors; perfect for customizing thoughtful gifts. It is a great choice for the Dish Cloths and these Mason Jar Covers.
Yarn Substitution
Any 4-weight yarn would work for this project.
YARNSUB.COM is a resource to find substitutions for yarn.

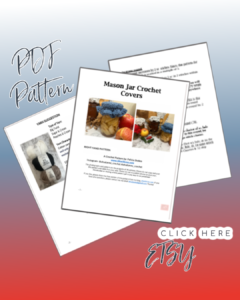
For an Ad-Free PDF Version of this Pattern Click Here, Etsy
For an Ad-Free PDF Version of this Pattern Click Here, Ravelry
VIDEO TUTORIAL
A video tutorial is available for this pattern; scroll down to see the tutorial.
PATTERN DETAILS
Skill Level
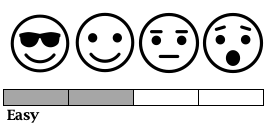
For a better understanding of skills, and learning Click Here. You’ll be led to the Craft Yarn Council for a deeper dive into skill levels.
This is a project for the advanced beginner. If you are new to crocheting you need to be comfortable completing a single crochet, double crochet, and working in a round.
Techniques:
Magic Circle- Check out this video Tutorial: Click Here
Adding Elastic Band- Check ou this video Tutorial: Click Here
NOTES
• This pattern is written in US terms and there is a key provided, to help with any abbreviations.
• Additional NOTES are placed throughout the pattern, for additional tips and instructions.
• There are hyperlinks included, within this pattern. If viewing, on an electronic device, you can click on the link(s), and you will be taken to the products used and helpful instructional video(s).
• Beginning chain counts as a stitch, in the overall stitch counts; unless Noted in Pattern.
• Increase rounds are necessary to complete this pattern.
• [ ] denotes the stitch count at the end of the row.
• *_* Denotes repeat sequence- Example: *2hdc, 1 hdc* – 2hdc followed by 1 hdc repeats throughout the round.
MATERIALS
Yarn
Approx 100 yards, 4-weight cotton yarn or cotton yarn blend
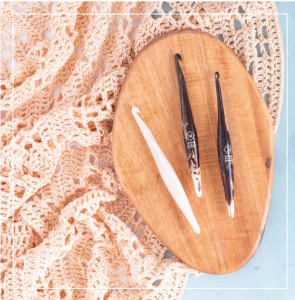
Hook
CROCHET HOOK 5.5MM/U.S I/9- FURL ODYSSEY
Notions
YARN NEEDLE
Elastic- round

Finished Measurement
The finished product measured approx. size 3” Regular mouth jars or 3.5” for Wide mouth Mason Jars.
GAUGE
Not necessary to complete this project

PATTERN ABBREVIATIONS (US Terms)
English (US) Terms
ch(s)– chain(s)
dc- double crochet
round– Rnd
sc– single crochet
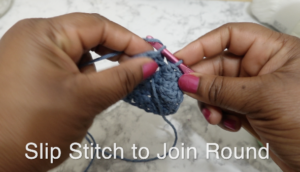
sl st- slip stitch
st(s)- stitch(es)
2dc– place 2 double crochet stitches into the ‘same’ stitch
3dc– place 3 double crochet stitches into the ‘same’ stitch

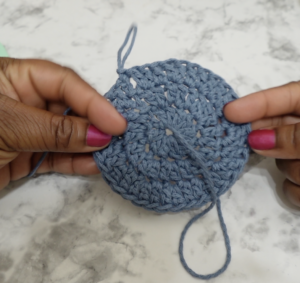
Magic Circle– an adjustable loop (or ring) technique that has a yarn tail that pulls to close, allowing the center hole to seal tightly closed.


For Ad Free Version of this Pattern:
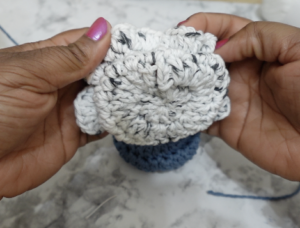
WRITTEN PATTERN FOR MASON JAR CROCHET COVER BERET
NOTE: The ch.3 will count as the first stitch in the round.
Complete Magic Circle, ch 3 ‘OR’ Complete Foundation Circle – ch 4, join with sl st in the first ch to form a ring, ch 3
Rnd 1: Place 11 dc into the magic circle (the ch 3 will count as your first dc), pull the circle close, sl st in the first dc to join. [12]


INCREASE ROUNDS 2-10
Rnd 2: ch 3, into the same stitch as the ch 3, 1 dc, 2dc into next stitch, 2dc, in the next; *repeat 2dc* in each stitch around, sl st in the first dc to join. [24]
Rnd 3: ch 3, 2dc next stitch, 1 dc, 2dc; *Repeat 1 dc, 2dc*, each stitch around, sl st in the first dc to join. [36] End with 2dc, in the same space
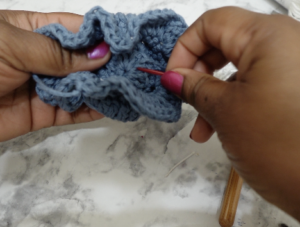
Adding Elastic for Regular Mouth Mason Jar
Rnd 4: ch 3, 2dc in next stitch, 1 dc, 1 dc, 2dc, 1 dc,
1 dc, *Repeat 2dc, 1 dc, 1 dc*, each stitch around, sl st in the first dc to join. [48] End with 1 dc


WIDE MOUTH MASON JAR (approx. 3.5”)
Rnd 4: ch 3, 2dc in next stitch, 1 dc, 1 dc, 2dc, 1 dc, 1 dc, *Repeat 2dc, 1 dc, 1 dc*, each stitch around, sl st in first dc to join. [48] End with 1 dc
Note: Rnd 4 will be the final increase round for WIDE mouth Mason Jar is approx. 3.5” across.
Adding Elastic for Wide Mouth Mason Jar
Measure elastic to fit around the top of the mason jar approx. 10″
Rnd 5: Attach elastic to the first st of the round, using a knot. Hold elastic while single crocheting in each stitch around. Tie together the starting elastic band with the ending elastic band to secure. Sl st in the first dc to join. [36]
Add another easy crochet project to your list? Try this next:
Frilly Trim/Border
Rnd 5 (or Rnd 6, depending on size): ch 3; 2dc in next stitch; 3dc in next, *Repeat 2dc, 3dc,* each stitch around, sl st in first dc to join [approx. 90- rnd 5 or approx. 120 rnd 6]
Finishing
Using the yarn needle, weave in ends & sure up the magic circle.
VIDEO TUTORIAL
Check out the video for visual instructions. Enjoy your Crochet Mason Jar covers.