


My goal is to try to simplify the process so you can fall in love with the art of crocheting and later learn more complicated techniques, as you get better. This tutorial/pattern will allow you to create a summertime cardigan (mainly I call it a summertime cardigan but it doesn’t have sleeves) using basic crochet stitches.
This tutorial is designed for the beginner/advanced beginner.
If you need some pointers on creating some basic stitches check out this article, which includes video tutorials below:

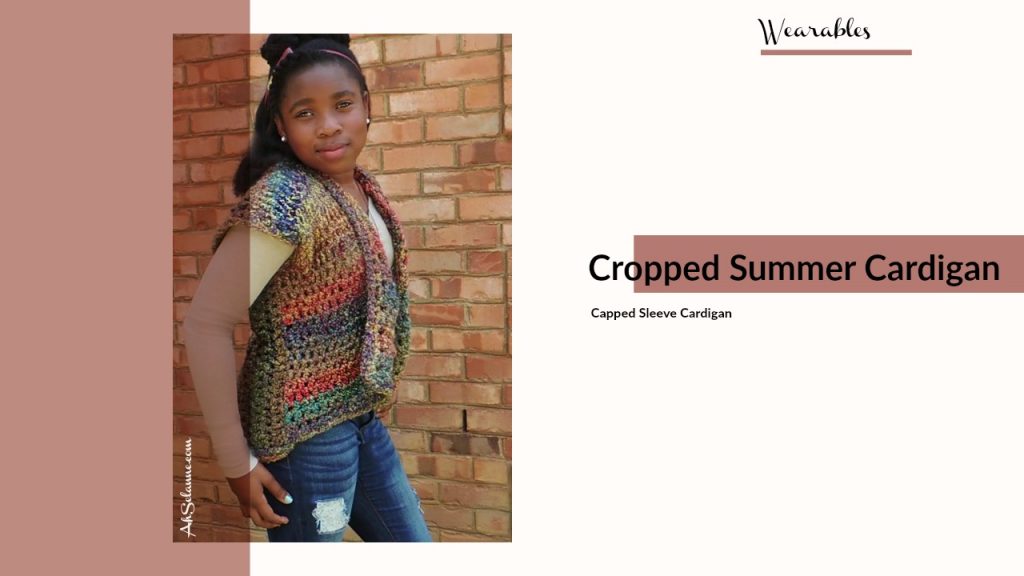
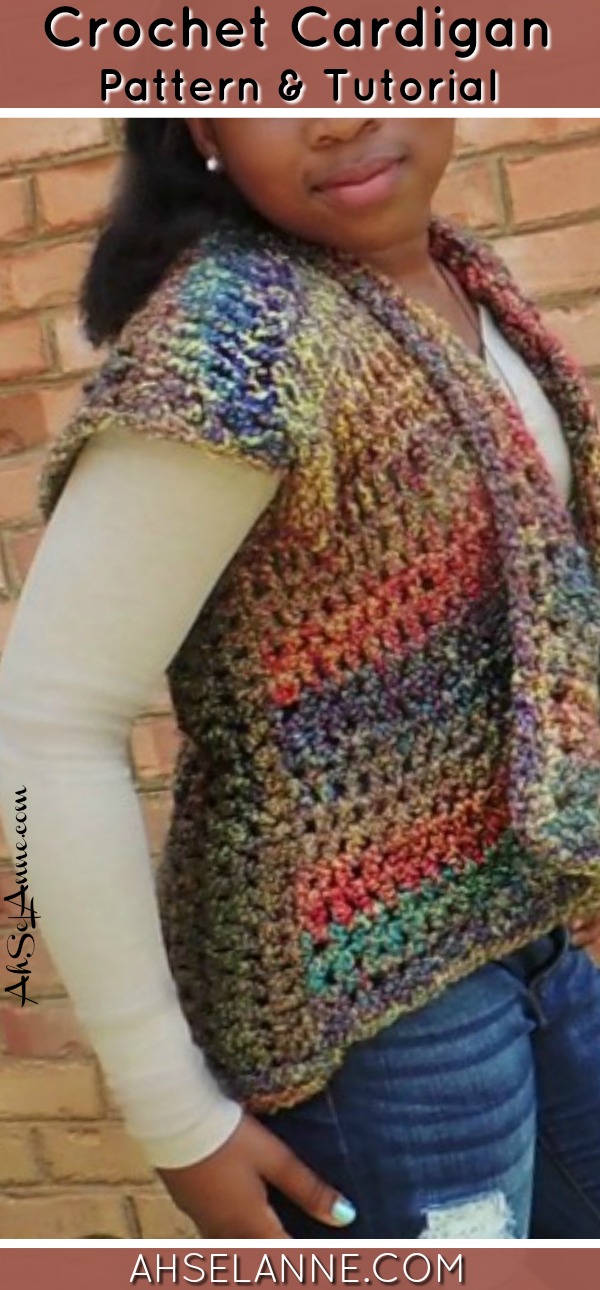
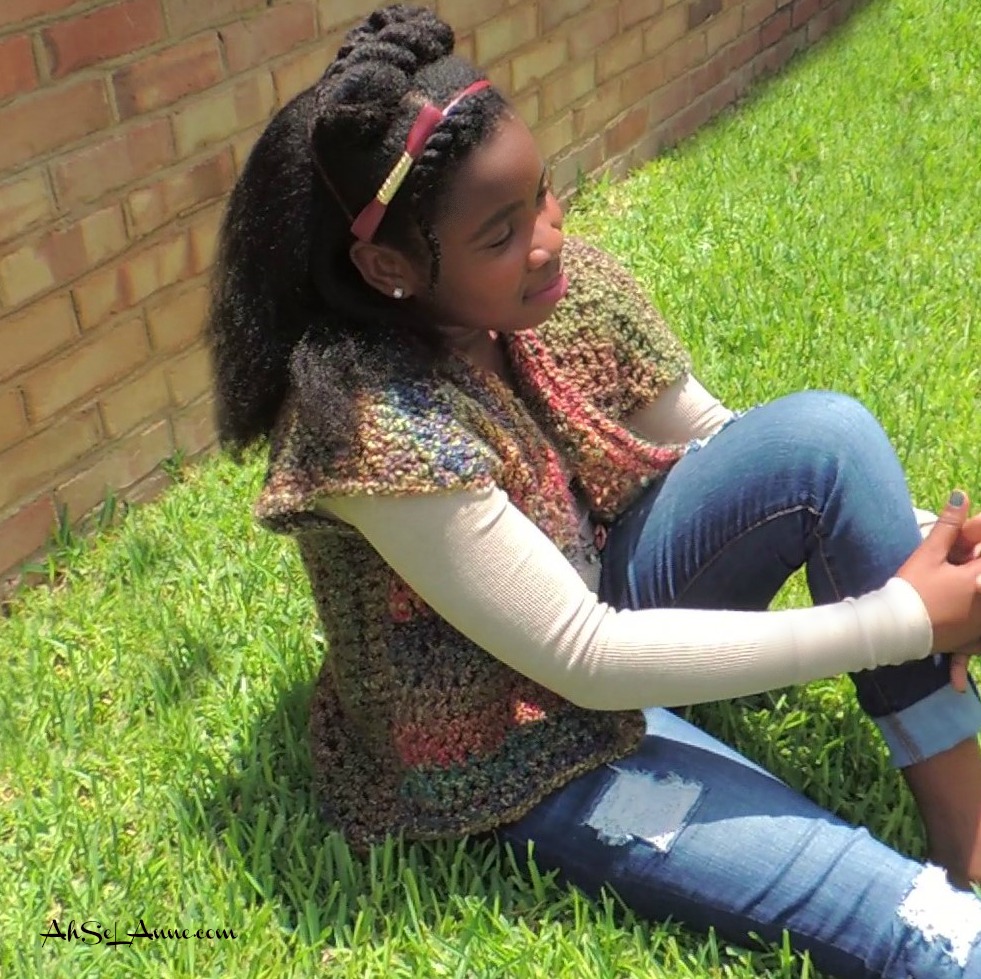
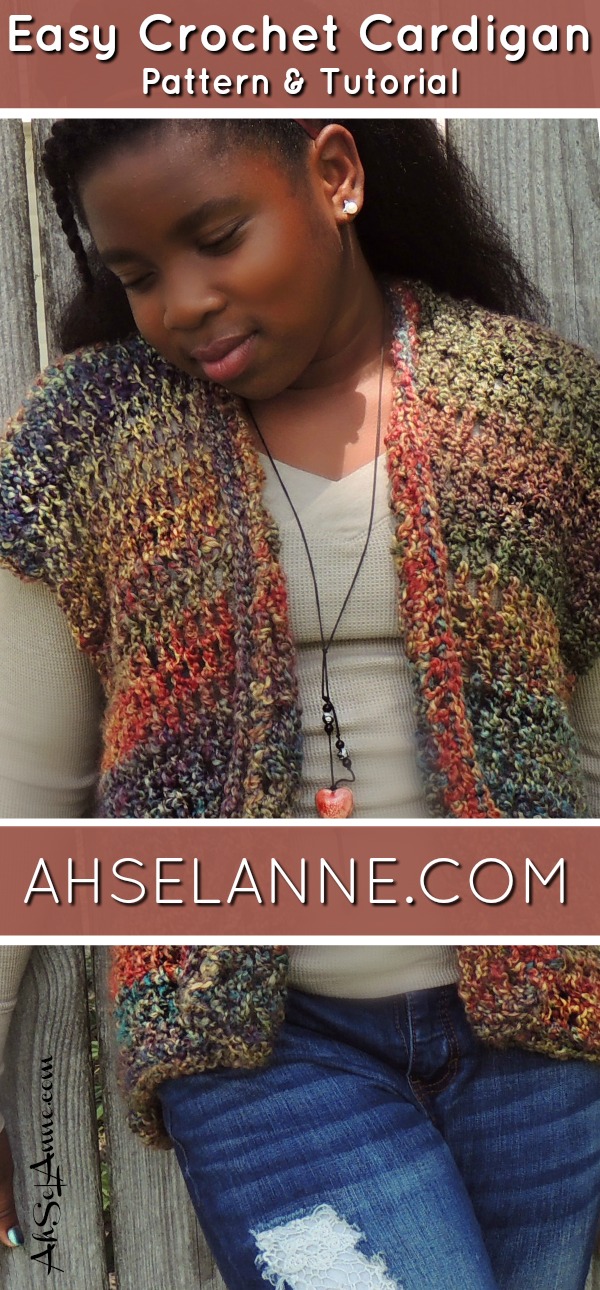
Summer Crochet Cardigan with Capped Sleeves
This pattern is written in basic terms, overall. I’ve also included a key, to help with any abbreviations. This pattern uses 2 stitches, a double crochet stitch and a single crochet stitch. There have been notes placed throughout the pattern to provide additional help. Along with a few pictures, there is also attached an instructional video
Materials Needed for the Golden Crochet Cardigan

•	Yarn Suggestion- Homespun Lion Brand
•	Hook- 9mm
•	Measuring Tape
•	Yarn Needle
•	Stitch Markers
•	Scissors

Legend:

ch- chain
dc- double crochet
sc-single crochet
sl st- Slip Stich
tw- turn work

Note:
This Summertime Crochet cardigan was created for a person with a small/med body size. Thus, these instructions have been written for this size. The goal was for the cardigan to be fitted with a bit of a slouch
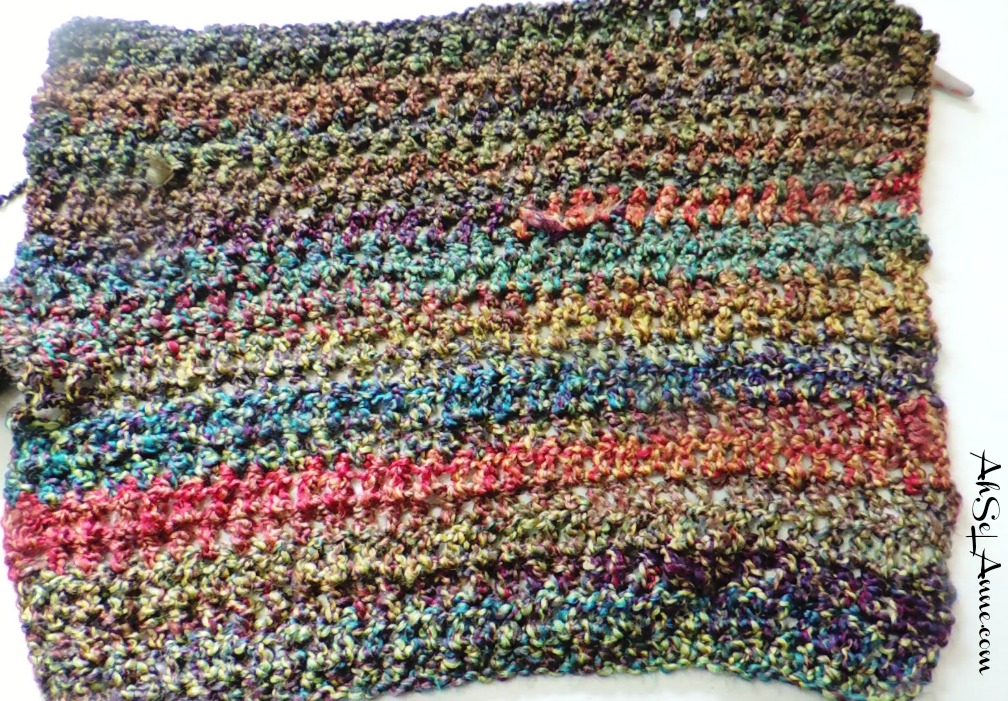
The cardigan pictured is 25” lengthwise (36 rows)
This project can be customized to fit all sizes.
To Adjust Size:
Measure from shoulder to shoulder to determine the width. Create the back panel with a foundation chain a few inches longer.
When you work on the front panel follow the instruction as written for the front (right and left) panel.
Note:
Keep in mind, measure yourself (shoulder to shoulder) and then chain enough to cover the distance, plus a few more. If you are making for someone else use the above measurements as a template.
Written Instructions
BACK PANEL:
Make a slip knot. Tighten around the hook.
Ch 32 plus 3 (There will be 33 stitches in each row the turning chain will count as a stitch) chains. Be sure to not pull your yarn too tight around your hook or it will be difficult to work the stitches in the foundation chain.
1). Row 1 – DC into 3rd stitch from the hook. Dc stitch down the row. (Place stitch in the turning chain stitch). Ch 3 tw, repeat.
2). Row 2- Place DC in first space in the row, place dc stitch down the row making sure to place a DC stitch
3). Row 3 –Row 25 or until the desired length is reach – repeat Row 2 (DC stitch into space). Make sure you place a stitch in the turning chain at the end of the row. Ch 3 and then tw start in the next row).
Fasten off, weave in the yarn.
FRONT PANELS
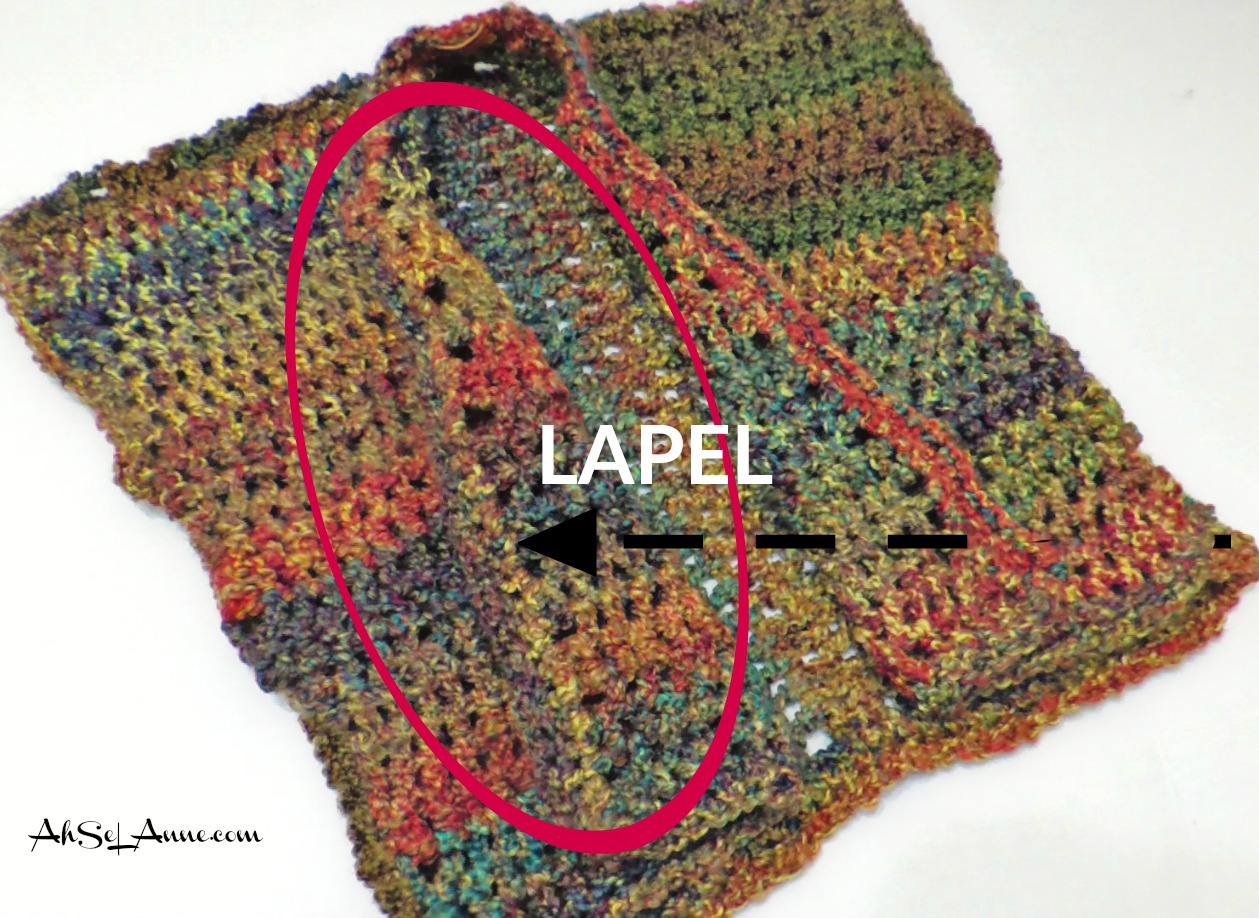
Right Panel:
Turn back panel to the side to work the cardigan vertically. The stitches should be vertical. (This is an optional step but I wanted to add a different look to the cardigan.)
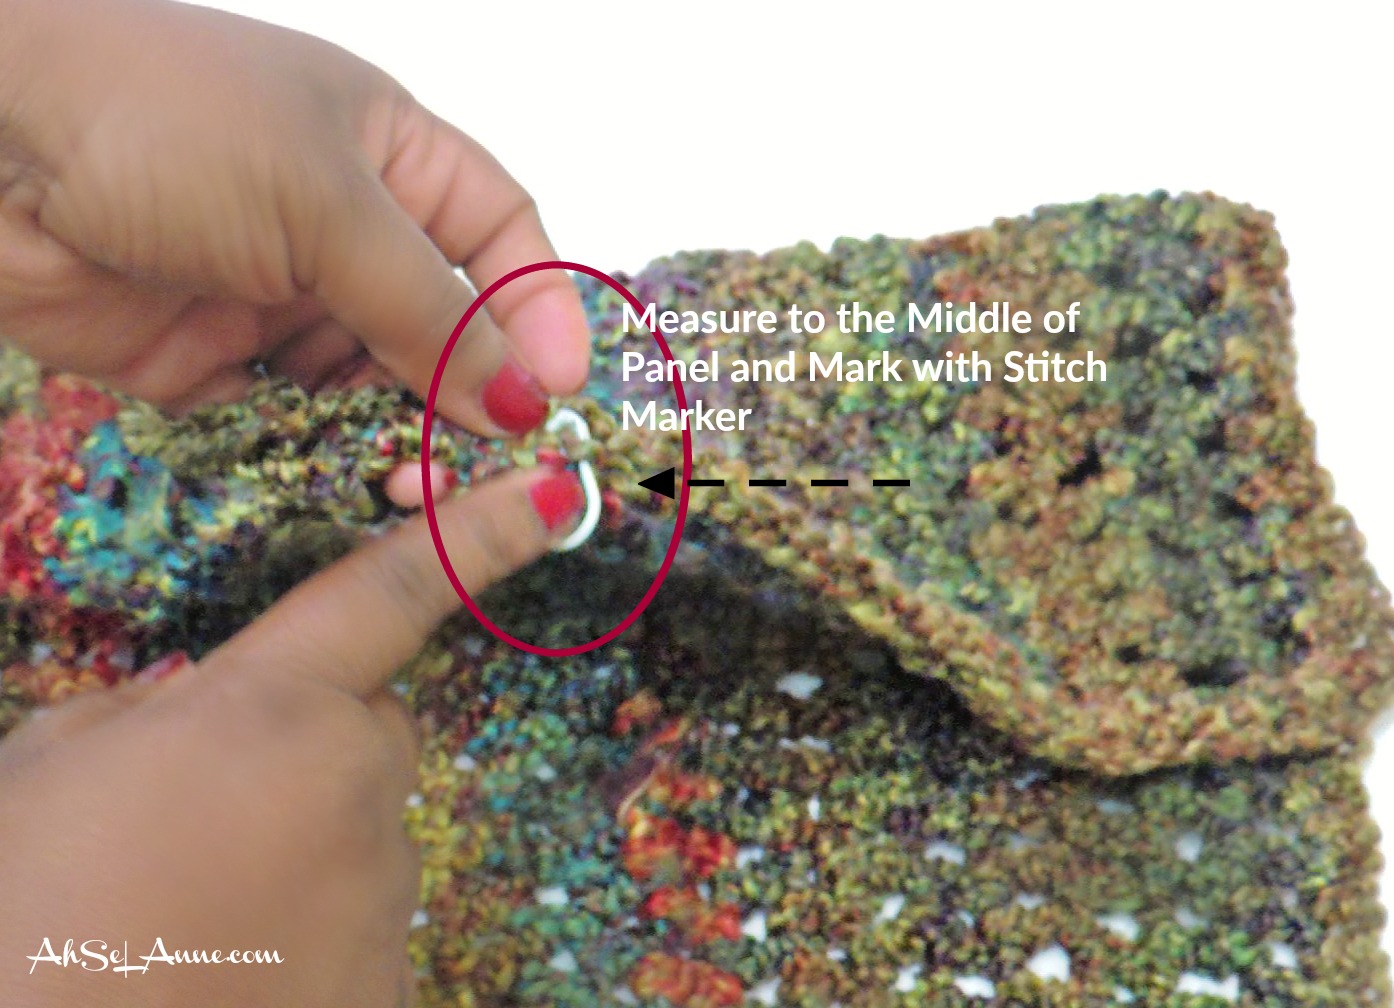
At the top of the back panel. Measure across to determine the middle. Small/Medium will be around stitch 16 inches in. Place stitch marker.
1). Row 1: Join yarn to first dc stitch on the right, place an sc stitch down the row (the length of the panel to create an even number of stitches). ch 2, tw.
2). Row 2: DC in 2nd stitch and then create row using dc stitches until the stitch marker is reached. Ch 3, tw.
3). Row 3- until the desired length is reached, repeat Row 2 (the row should match the back panel 25 rows)
Left Panel:
Follow the instruction for the right panel.
1). Row 1: Start at the stitch marker to the left of the middle stitch marker. Attach the yarn and work across the row. Create a row of dc stitches until you reach the end of the panel. Ch 3, tw
2). Row 2: DC in 2nd stitch and then create row using dc stitches until the stitch marker is reached. Ch 3, tw.
3). Row 3until the desired length, repeat Row 2 (the row should match the back panel 25 rows)

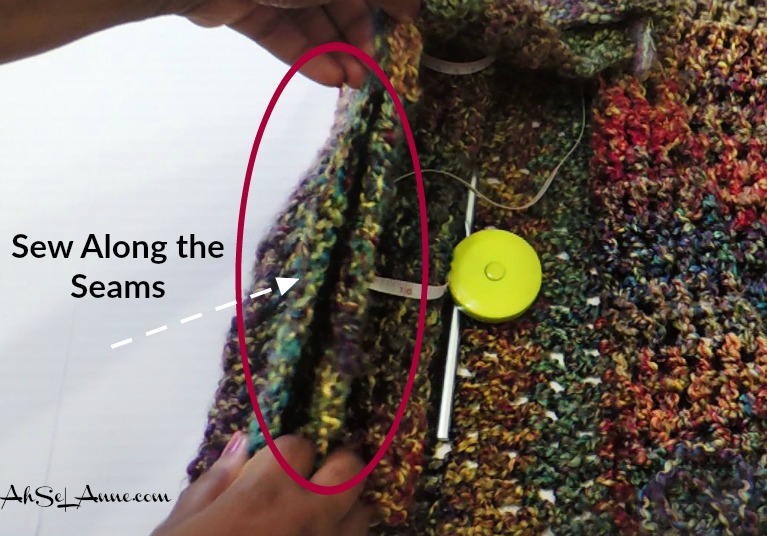
CONSTRUCTING CARDIGAN:
Align the front panels with the back panel and measure along the side, top to approx. 7” for the armhole.
Note: depending on the size of the cardigan this measurement can vary. If a smaller arm area is needed, measure 6” from the top. For a larger arm area, large/x-large, measure 8” from the top.
Place a stitch marker 7” down from the top. This will create the armhole for the cardigan’s sleeve.
SLEEVES
Left Sleeve:
Round 1: Attach yarn at the underarm area of the sleeve, sc around the opening sl st into the first stitch.
Fasten off, weave in the yarn
Right Sleeve:
Repeat above steps for left sleeve
COLLAR/NECKLINE (OPTIONAL)
Note:
The stitch count will vary, the goal is to make sure the trim looks neat and consistent. Some spaces may only need 1 sc stitch and some spaces may need 2 sc stitches. Areas with large holes need 2 stitches.
Row 1: Attach string to the bottom left corner of the front panel, sc into each stitch along the panel, until work all the around, therefore creating a small label/border.
Fasten off, weave in the yarn
POCKET(S) (OPTIONAL)
Row 1: Ch1 3
Row 2: sc into the first stitch from the hook, continue down the row. Ch 1 tw.
Row 3: sc into the first stitch from the hook, continue down the row. Ch 1 tw
Row 4-8: repeat row 3, (until desire length)


Check out the below video to help with a visual construction of the summer crochet Cardigan.