


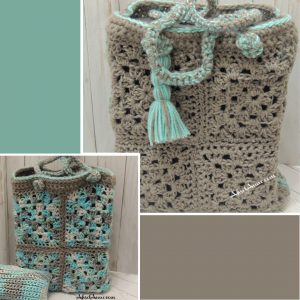
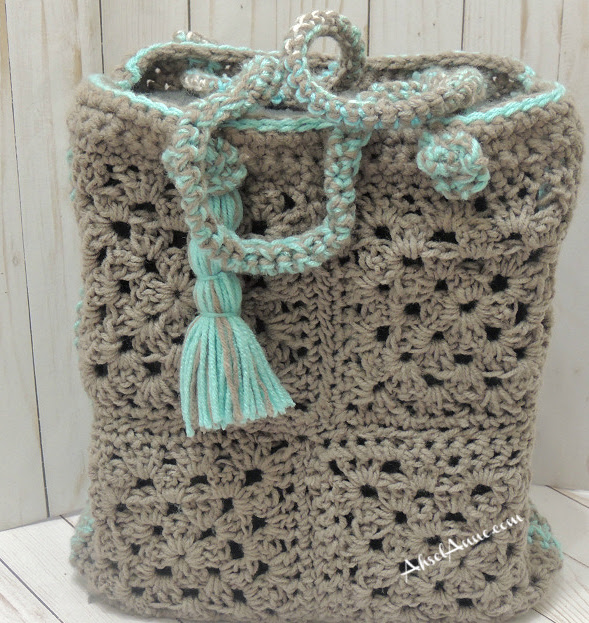
Granny Square Tote

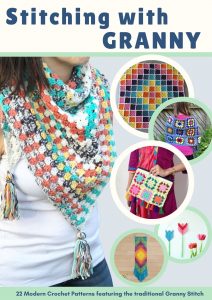
Guess what, my Granny Square Tote has been included in the Stitching with Granny Crochet Pattern Bundle for August 13th – 16th.
I’m sure you’re asking, “What’s the Granny Crochet Pattern Bundle?” Well, I’m glad you asked, this bundle is the perfect way for you to get your hands on 23 Modern Crochet Patterns featuring, you guessed it, the Granny Stitch.
For Limited, and I mean Limited, you can get ALL 23 Crochet Patterns for just $12.95. Whaattt… I know, that’s literally less than $.60 for each pattern!
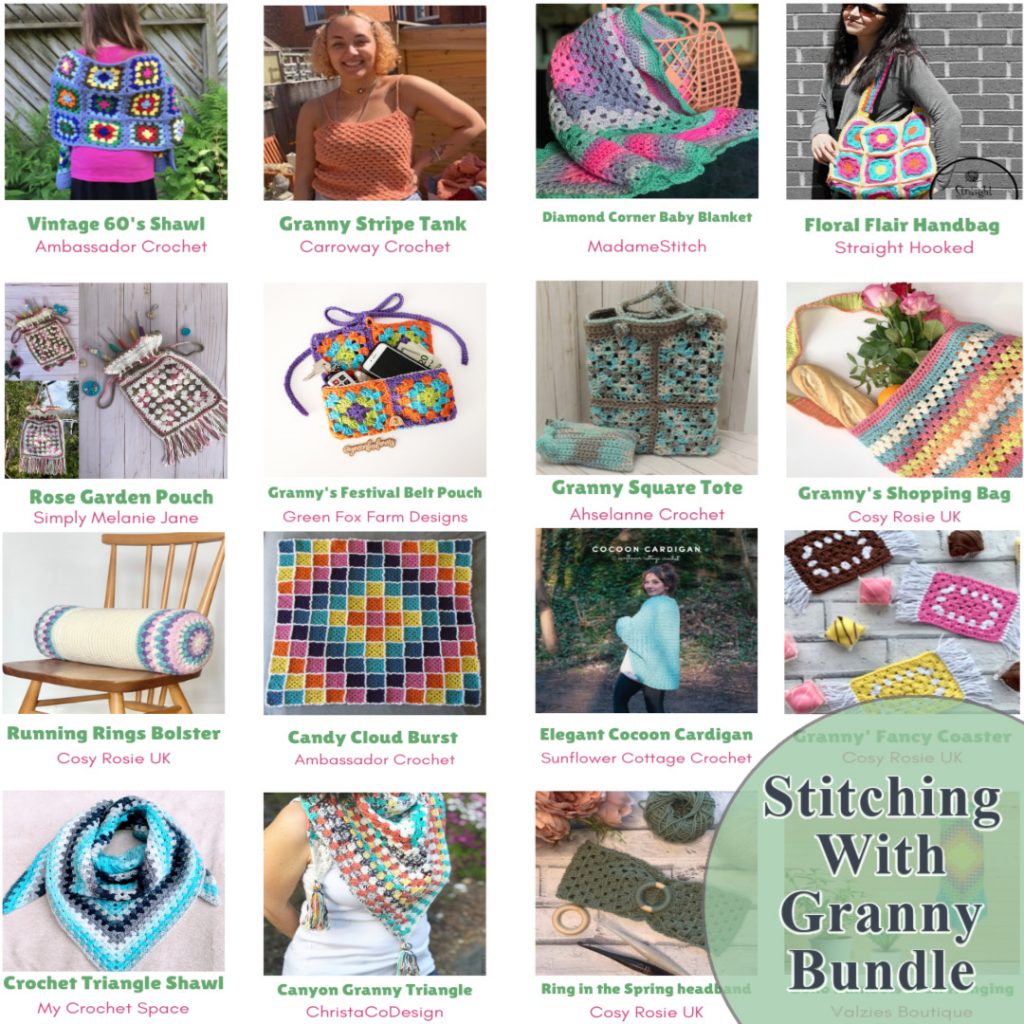
The normal price for this crochet pattern bundle will be $18.00, BUT until August 16th, you can get all 23 crochet patterns included for just $12.95!!!
There is nothing ‘granny’ about this fashionable Tote except for the name. The Granny Square Tote is created by connecting traditional granny squares into a rectangle design. It’s a two-sided creation with a matching tassel embellishment that pulls the whole design together. This stylish Tote will be a great addition to your wardrobe.
Yarn
I opted to use a 100% acrylic yarn by RedHeart Super Saver, in the colorway of Icelandic, Aruba Sea, and Heather Gray. This 4-weight yarn is easily accessible, comes in a variety of colors, and is durable.
You’ll need 3 skeins of jumbo yarn. 1 in each color.
Please know, all is fair in love and yarn, so fall in love with any 4-weight yarn BUT keep in mind Red heart, Supersaver tends to be durable. So, keep that in mind since the Tote may receive some wear and tear.
Skill Level
This is a project for the advanced beginner. If you are new to crocheting you need to be comfortable completing single crochet and double crochet stitch. You’ll also need to be comfortable sewing the project together.
Note: This pattern is written in U.S. terms and there is a key provided, to help with any abbreviations. Also, there have been Notes placed throughout the pattern to provide additional help. There are a few pictures and also an instructional video to assist with this project. Scroll Down.
Materials for Granny Square Tote
MATERIALS
Yarn Suggestion- 700-800 yards of 4 weigh Acrylic Yarn, (3 different colors)
Hook
Crochet Hook 6.5mm/k
Notions
Yarn Needle
Scissors
Stitch Markers
Gauge
The Gauge may vary based on your crochet style.
Finished Measurement
This is Tote:
11 ½” wide x 13” height.
Abbreviations (US Terms)
ch- chain
dc- double crochet
dbst- double strands held together
sc- single crochet
sl st- slip stich
sk- skip
sp- space
st(s)- stitches
tw- turn work
Cluster- 3 dc worked in the same space
Notes:
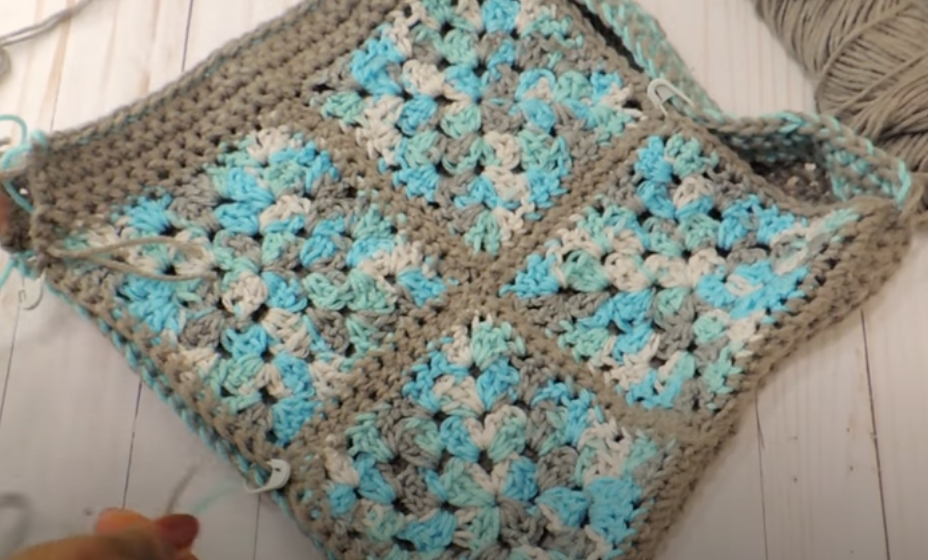
The Granny Square is created with a series of cluster stitches, 3 double crochet stitches in the same space. The square is started by creating a circle and then a series of clusters, to form a square pattern.
While there is a written pattern below, it may be easier to see a visual illustration of this pattern. Visit AhselAnne- on YouTube or Click Here; to view a visual tutorial of the below pattern.
Round 1
Step 1:
Ch 4
Insert the crochet hook into stitch, furthest from hook; sl st to join, creating a circle.
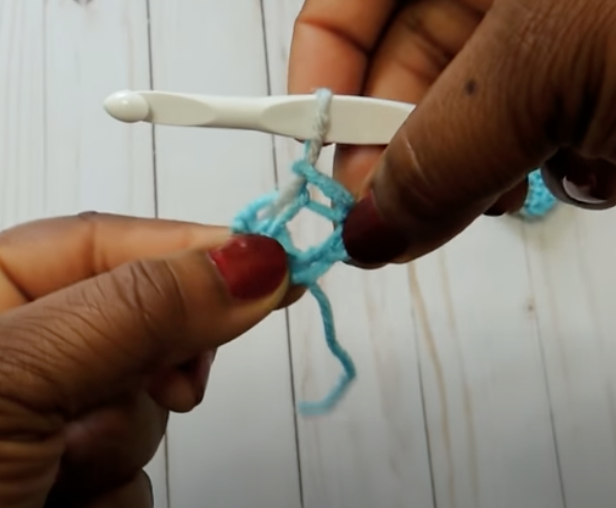
Step 2:
Ch 3 (this will count as your first double crochet stitch), place 2 dc into the center hole (created in Step 1) You should have a cluster of 3 dc.
Step 3:
Ch2, Place 3 dc into the center hole.
Step 4:
Ch 2, Place 3 dc into the center hole.
Step 5:
Ch 2, Place 3 dc into the center hole; ch1, sl st to join the round.
Note: All the dc stitches are worked into the center hole, created in step one. At this point, you should have a total of 4 corners consisting of 4 clusters.
Defining Corners
Round 2
Ch 3, turn work, place 2 dc into same space as the ch 3, sk over cluster from previous round; 3dc into open space, ch2 3dc into same space. [*sk over next cluster, 3dc into open space, ch 2, 3dc into same space]; Repeat from [*] around, end with 3dc into beginning space. Ch1 sl st to join round.
Note: When you place 1 cluster, ch2, 1 cluster into the same space [3dc ch2, 3dc] this creates a corner.


For Ad-Free Written PDF Pattern Click Here!!!

NOTE:
These instructions were created for the beginner crocheter. These instructions may not read like a traditional pattern because I wanted to make sure the beginner crocheter understood the written process.
Ch 3, turn work, place 2 dc into same space as the ch;
sk over cluster from previous round, 3dc into open space; sk over cluster from previous round; 3dc, ch 2, 3dc (in the same corner space);
sk over cluster from previous round; 3dc;
sk over cluster from previous round; 3dc, ch2 3dc (in the same corner space);
sk over cluster from previous round; 3dc;
sk over cluster from previous round; 3dc, ch2 3dc (in the same corner space);
sk over cluster from previous round; 3dc
sk over cluster, 3dc into beginning space. Ch1 sl st to join round.
Round 4
Repeat steps from Round 3 to complete round. Be sure to place 3dc, ch2, 3dc into corner spaces.
Round 5
Repeat steps from Round 3, to complete round. Be sure to place 3dc, ch2, 3dc into corner spaces. Fasten off, leave a long tail, or proceed to Round 6.
Note: Granny Square should measure to approx. 5”/13cm, if your square is too small you can go around another row. Just be sure you complete all the squares to the same size.
Round 6 (Optional)
Change Color- Charcoal
Ch 1, sc, each stitch around; to block the square. I used a contrasting color for my blocking since my Tote is two-sided.
Complete this step to all 8, 5” Granny Squares.
Construction:
Lay four squares out in a rectangle. Using stitch marker, attached squares together to make sewing together easier
Using a yarn needle and the gray yarn, whipstitch/sew the granny squares together.


Another Fun Crochet Creation
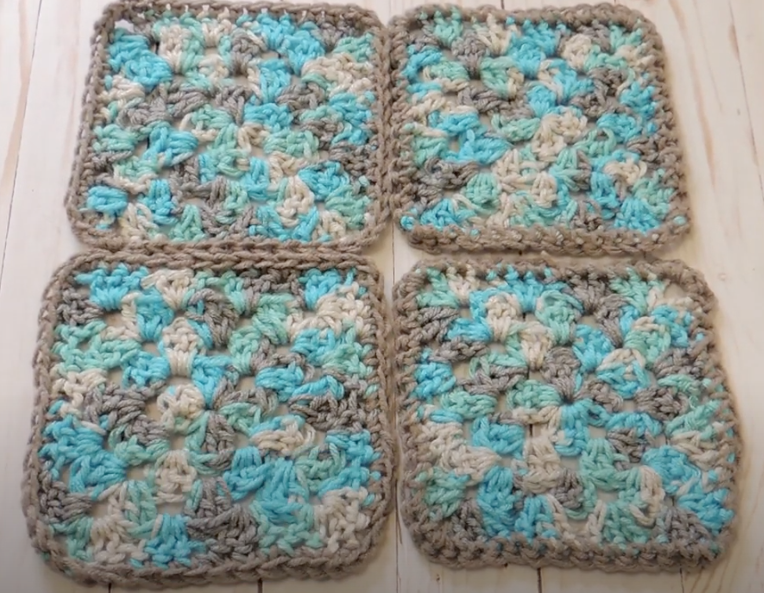
Start by sewing/connecting 2 squares together, then add on another square and then the last square; creating a single panel of granny squares.
Complete this step for the front and back panels.
Side Panel/Bottom Panel (One Side Only)
Pick either panel, the front or the back, and complete the following steps:
Turn the panel horizontally; Attach yarn to the corner of the panel, create 3 rows of sc stitches. The Single crochet row should be the length of the panel (I had 30 sc stitches but this number may vary).
Make a note of the number of sc stitches you created, in the row. You’ll want to make sure you have the same number of stitches from row to row and along the left and the right side.

These sc rows will add depth to the Tote.
Approx. 1 ½”/ 4cm.
Repeat the same process along the bottom. Attach the yarn to the corner and sc across. (3 rows).

Note:
Again, the side/bottom sc rows are only added to one panel. Either the Front Panel or the Back Panel. You will create the sc rows to the left, right side and the bottom of the panel.
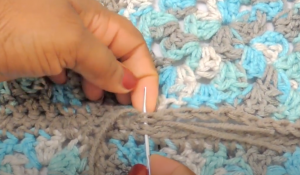
Construction
Once the side panel has been completed, adding 3 rows of sc along the left and right sides. Sew the bag together.
Lay the front panel, on top of the bottom panel (placing the wrong sides together, you will flip the Tote inside out once it has been sewed together). Using stitch markers, secure the bag together and then sew along the edges.
NOTE: I used two strands of yarn, held together to sew the Tote together. This allowed the Tote to be secured tightly.
How To Series– HOW TO CREATE DOUBLE CROCHET STITCH

Top
After Tote has been sewn together. Attach yarn to the top corner of Tote and sc around the top portion of the Tote.
Complete 3 rounds of sc stitches. This will block the project along the top and make a more cohesive project.
While this is an optional step, it really adds a polished look to the finished project.
CREATE A CORD
Create a cord that is 26” long.
This can be done by creating a chain and 2 rows of sc or you can use a Lucet Fork to create a thick cord.
Create 2 cords, one from the front and back panel.
NOTE:
For visual tutorial click the links below or visit- AhselAnne- Youtube.
– To create a cord using chain stitch and sc stitches CLICK HERE
– To create a cord using a Lucet Fork CLICK HERE
Attach the cord through the top section of the Tote, spacing it equally, use a stitch marker to secure it, and then sew down to ensure it stays in place.
Mirror the cord placement on the other side of the
Tote.
Create Coordinating Tassel
A coordinating tassel is an optional embellishment created by using yarn from the project.
CLICK HERE for a tutorial on how to create a tassel.
Attach the tassel to the Tote using a yarn needle.
Click Below for the Video Tutorial:
Enjoy your Granny Square Tote. Feel free to make and sell products from my patterns but please give credit to AhselAnne for the pattern. Please do not copy and post this pattern and claim it as your own. Please do not re-publish photos as your own. Distribution or sharing of this pattern pdf in any way is not permitted – if you like, please share the free version of this pattern from my blog, ahselanne.com. ~Thank you