

Crochet Angel Holiday Decor
I absolutely love Learning, Creating, and Sharing. Check out my Disclosure for details on what that entails. Crochet Angel -Holiday Decor
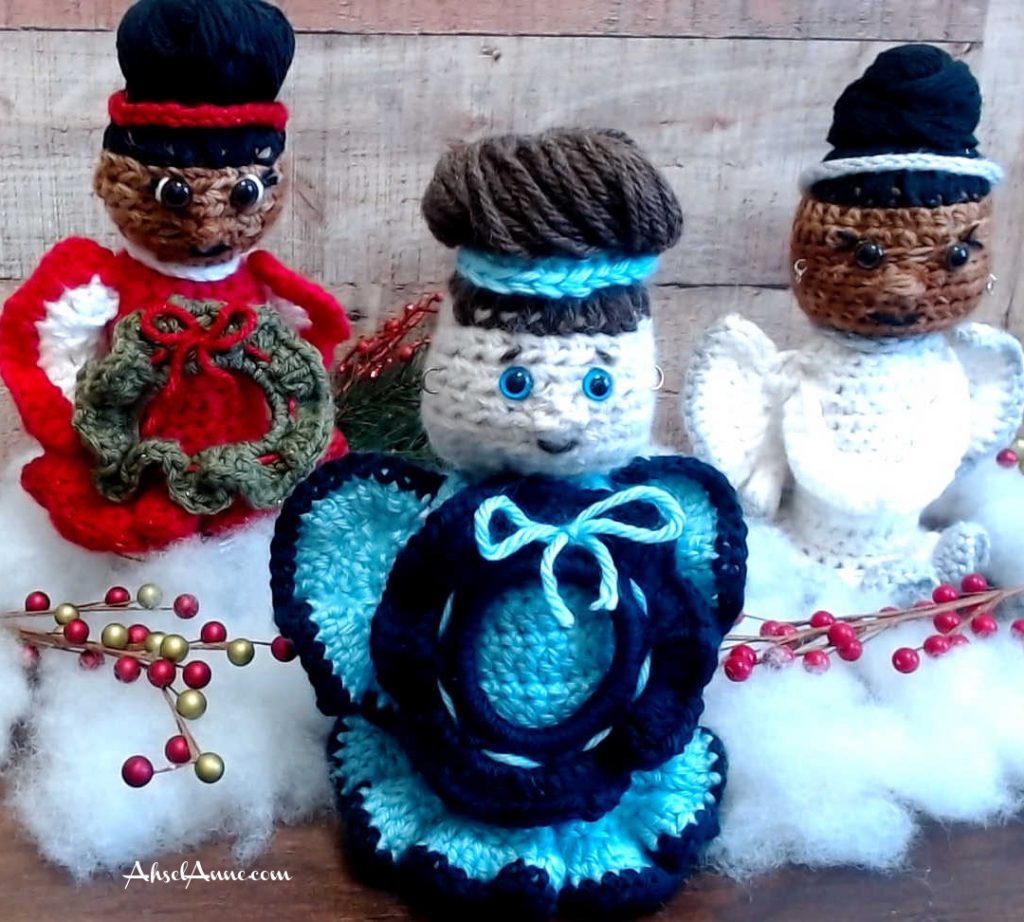
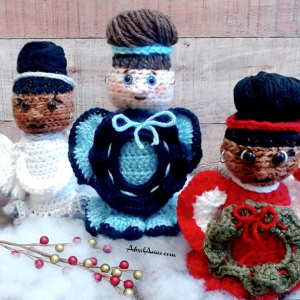
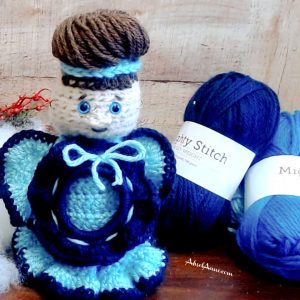
The Crochet Angel -Holiday Decor is a perfect addition to your Christmas décor. They are created using acrylic yarn, and a little creativity. These holiday angels are fun and easy to make. They stand freely with the help of a craft tube insert and make for a perfect addition to a tablescape. You can start now to get ready for your holiday decorating.
This pattern uses a few different stitches; the single, the half-double, and the double crochet stitch. It’s a beginner pattern but you need to be comfortable working in the round to complete the head portion of the project. When finished you should have an angelic holiday-inspired crochet creation.
This project was sponsored by WeCrochet/Knitpicks as part of Winter Blog Hop. Yarn was provided for the design. The post contains affiliate links, and is at no additional cost to you, please see my disclosure for full details.
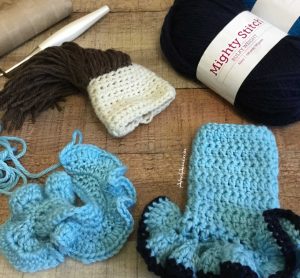
YARN
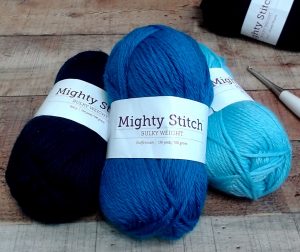
I use a worsted weight yarn, Mighty Stitch Bulky Weight. This is 100% Acrylic, 4 that is, 120 yards, per skein (Colorway-Navy, Sky, Cream, Bark).
I loved the versatility of this yarn, while it’s an acrylic yarn. It is soft to the touch and easy to work with. there are 14 beautiful, bright colors.
Which makes it perfect for many different crochet projects. But don’t just take my word for it.
Click here or on the image below to see all the wonderful colorways that WeCrochet has to offer!
You’ll need multiple colors of yarn, Approx. 300 yards to make this Holly Angel Crochet Holiday Decor.
SUPPLIES
Crochet Angel -Holiday Decor
Yarn
300 yards of 5 weigh, Acrylic, Yarn- Mighty Stitch BULKY –
A-Navy, B-Sky, C-Cream, D-Bark
Hook
Crochet Hook 5.5mm- Furl Odyssey0

Notions
Yarn Needle
Scissors
Stitch Markers (Optional)Craft Tube
Elastic Band- Ponytail Holder- 3mm or 4mm (Optional for wreath)
For an Ad-Free PDF Version of this Pattern Click Here- Etsy
For an Ad-Free PDF Version of the Pattern Click Here- Raverly
PATTERN DETAILS
Skill Level
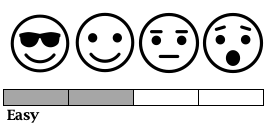
This is a project for the advanced beginner. If you are new to crocheting you need to be comfortable completing a single crochet, a double crochet stitch and a half double crochet stitch.
Note: This pattern is written in U.S. terms and there is a key provided, to help with any abbreviations. Also, there have been Notes placed throughout the pattern to provide additional help. There are a few pictures and instructional videos, that have tips on the different stitches used, The videos can be found on my YouTube -AhselAnne.
Gauge
The gauge may vary based on your crochet style. It’s not a necessary part of this pattern to keep a specific gauge

Finished Measurement
Height 7.5”
Abbreviations (US Terms)
ch- chain
dc- double crochet
hdc- half double crochet
sc- single crochet
sk- skip a stitch
st(s)- stitches
sp- space
sl st- slip stitch
rnd- round
tw- turn work


Notes
Special Stitches
This project is completed in Section: Body, Fringe, Wing, and Head. Once each section is complete, you will sew the pieces together to create your Angel.
For a Video Tutorial on how to complete the project scroll below.
Need an additional Holiday Tablescape? Try this project next:
WRITTEN PATTERN
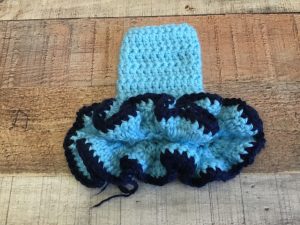
Body (Yarn Color B)
NOTE: The body is created by alternating between sc and dc rows. R1-R14 ending with a dc row.
Ch 25
R1: sc (in the first stitch from hook); sc each stitch across (24); tw.
R2: ch 3, (the ch 3 will count as the first stitch in the row), dc in each stitch across (24); tw.
R3: ch 1, sc (in each stitch across), tw. (24)
R4: ch 3, dc (in each stitch across), tw. (24)
R5: ch 1, sc (in each stitch across), tw. (24)
R6: ch 3, dc (in each stitch across), tw. (24)
R7: ch 1, sc (in each stitch across), tw. (24)
R8: ch 3, dc (in each stitch across), tw. (24)
R9: ch 1, sc (in each stitch across), tw. (24)
R10: ch 3, dc (in each stitch across), tw. (24)
R11: ch 1, sc (in each stitch across), tw. (24)
R12: ch 3, dc (in each stitch across), tw. (24)
R13: ch 1, sc (in each stitch across), tw. (24)
R14: ch 3, dc (in each stitch across), tw. (24)
Fasten off, leaving a long tail.
NOTE: You can create the fringe prior to sewing into a tube, ch3; tw; and skip to R1 below.
Creating the fridge, prior to sewing into a tube will allow you to continue working in rows versus working in around.
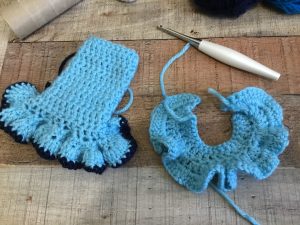
Fringe/Bottom of the Skirt (Yarn Color A & B) Crochet Angel -Holiday Decor
– Fold crochet swatch in half.
– Sew along the raw edge to create a tube.
– Reattach the yarn at the bottom of the tube, at the seam; ch3.
R1: 2dc into the same stitch (the ch 3 will count as the first dc), 3dc into the next stitch; repeat. Place 3dc into each stitch around (72).
R2: ch3, 2dc (the ch3 will count as the first dc), 3dc each stitch around (216).
Optional- Change Yarn Color (Accent Color- A)
R3: ch1; sc each stitch around to create an accent color border.
Wing (Yarn Color B & A for Trim)
Ch 21
R1: sc, each stitch across (20); ch 3; tw.
R2: dc, each stitch across (20); ch 1; tw.
R3: sc, each stitch across (20); ch 3, tw.
R4: 3dc, 2dc, 3dc, alternate [*3dc, 2dc, 3dc] each stitch across; ch 3; tw.
Optional – Change Yarn Color- (Yarn A)
R5: 3dc, 2dc, 3dc, alternate [*3dc, 2dc, 3dc] each stitch across; ch 3; tw.
Finish off, leave a long tail, approx. 12” to attach the wing to body.
Head (Yarn- C) Crochet Angel -Holiday Decor
Magic Circle: Ch 3 (This ch 3 is your first hdc).
R1: Place 7 hdc, into the circle (8); sl st to join round
Increase Round (2&3)
R2: Ch 2 (the ch 2 will count as hdc), 1hdc (in the same stitch as the ch 2); 2hdc in each stitch around (16); sl st to join.
R3: Ch 2, (the ch 2 will count as 1st hdc); 1 hdc (in the next stitch); 2hdc in next stitch; *[1 hdc in the next stitch, 1 hdc in the next stitch, 2hdc in next stitch]; This is the Pattern
Repeat [*], each stitch round. End with 2hdc in the last stitch around (24); sl st to join.
R4: ch 2, 1 hdc, in each stitch around (24); sl st to join.
R5: ch 2, 1 hdc, in each stitch around (24); sl st to join.
R6: ch 2, 1 hdc, in each stitch around (24); sl st to join.
R7: ch 2, 1 hdc, in each stitch around (24); sl st to join.
R8: ch 2, 1 hdc, in each stitch around (24); sl st to join.
R9: ch 2, 1 hdc, in each stitch around (24); sl st to join.
R10: ch 2, 1 hdc, in each stitch around (24); sl st to join.
Fasten off round. Leave a long tail to close the circular head.
Construction of Head
NOTE:
This part of the pattern is the creator’s choice. You can add eyes, a mouth, a nose before you stuff and seal, or you can stuff the head, sew closed and then add the face details.
Faceless angels are also very unique and beautiful, so you may opt not to add the face details.
– Stuff the head with cotton fiber filler
– Using the long tail, sew along the circle edge to cinch close. Fastening off to ensure the head is closed.
Hair (Yarn- Color D)
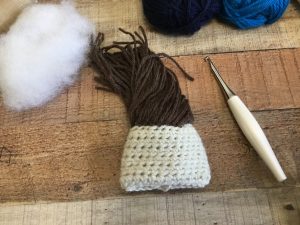 – Cut 6”-8”, yarn strands, the amount you need will vary based on your style; approx. 40 pieces.
– Loop strands through crochet stitch at the top portion of the head, secure with a tie/knot continue until you achieve the desired look.
– Style in a ponytail and then form a bun.
Scroll down to get a visual aid on how the head was constructed.
Constructing Crochet Angel -Holiday Decor
Using the long tail or coordinating yarn attach to individual section
Body– sew/chinch the top opening of the body closed (use the same technique used to sew the head closed)
The fringe side will remain open, this is where the craft tube/toilet paper roll will be inserted.
Head– attached the head to the body. For a visual tutorial please click here: Attaching head to body
Wing- Attach the wing to the body
Creating the Wreath
The wreath is created using a small elastic hairband and a pattern that uses sc stitches. I found a nice YouTube video tutorial. Please click here for a video tutorial on how to create the wreath.
Here is a quick written pattern. Please Note: The video tutorial is a better resource.
– Attach the yarn to the elastic band (size 3mm or 4mm).
R1: sc around the band (30); sl st to join round.
R2: ch 2, sk 1, sc (into 2nd stitch from hook); *[ch2, sk 1, sc] repeat around [*]. Sl st to join round. Fasten off.
– Using a contrasting yarn color, weave the yarn through open space (the skip spaces), leave a tail at the beginning. Tie the two ends together creating a bow.
– Center the wreath and then attach it to the front of the Angel.


Check out the Video Tutorial for additional help and tips: